Vehicle management
Vehicle management helps businesses set up a vehicle list, manage detailed records and monitor locations and travel routes directly on online maps.
Manage vehicle types
Step 1
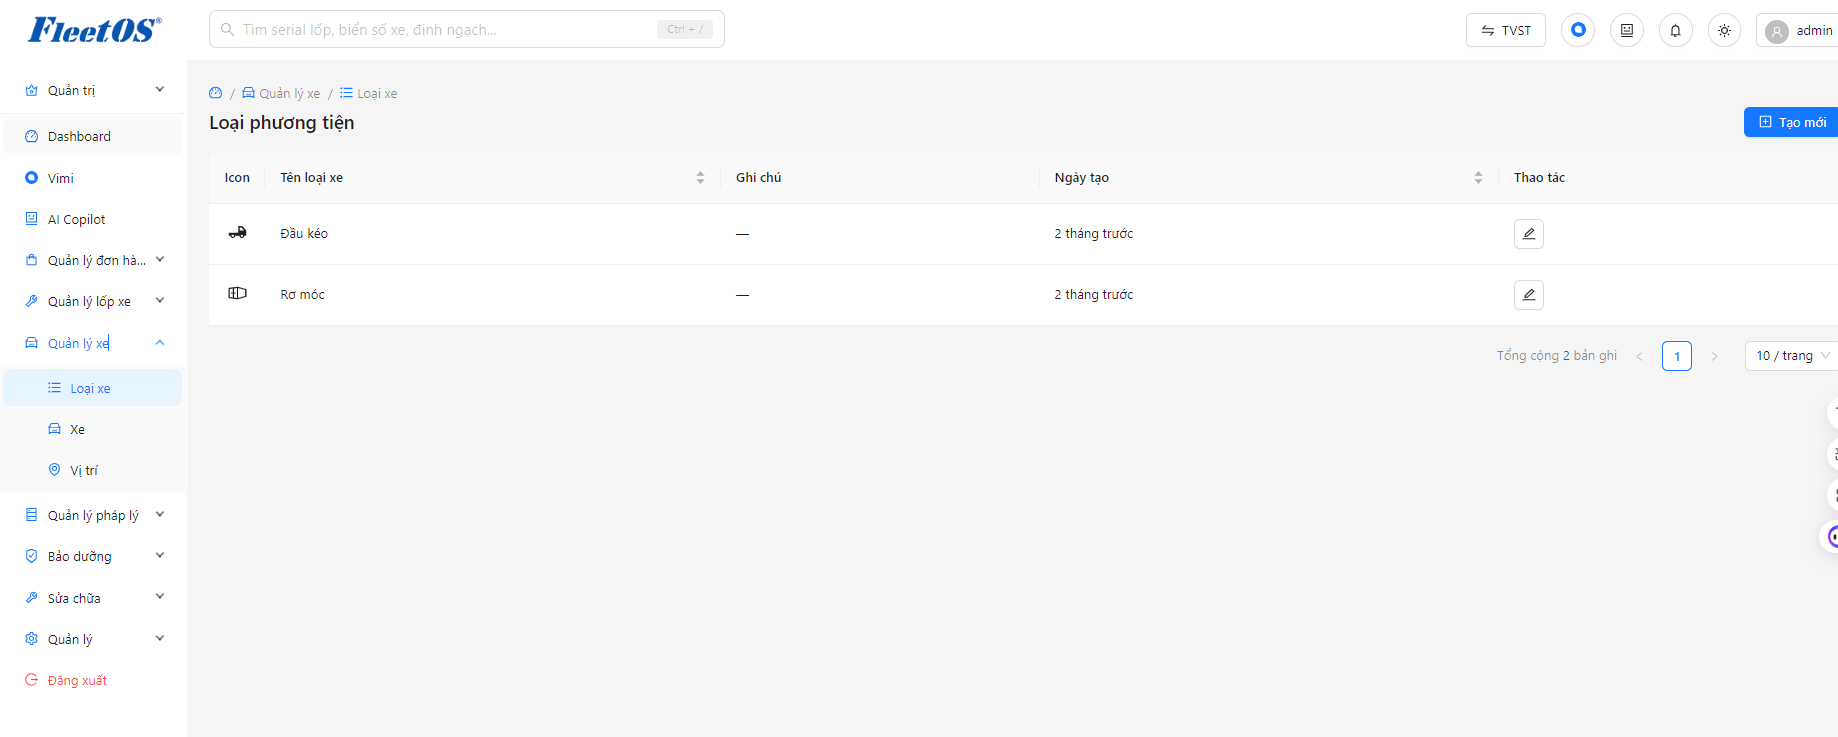
Go to Vehicle Management group → Vehicle type. On the list screen, click the Create New button.
Step 2
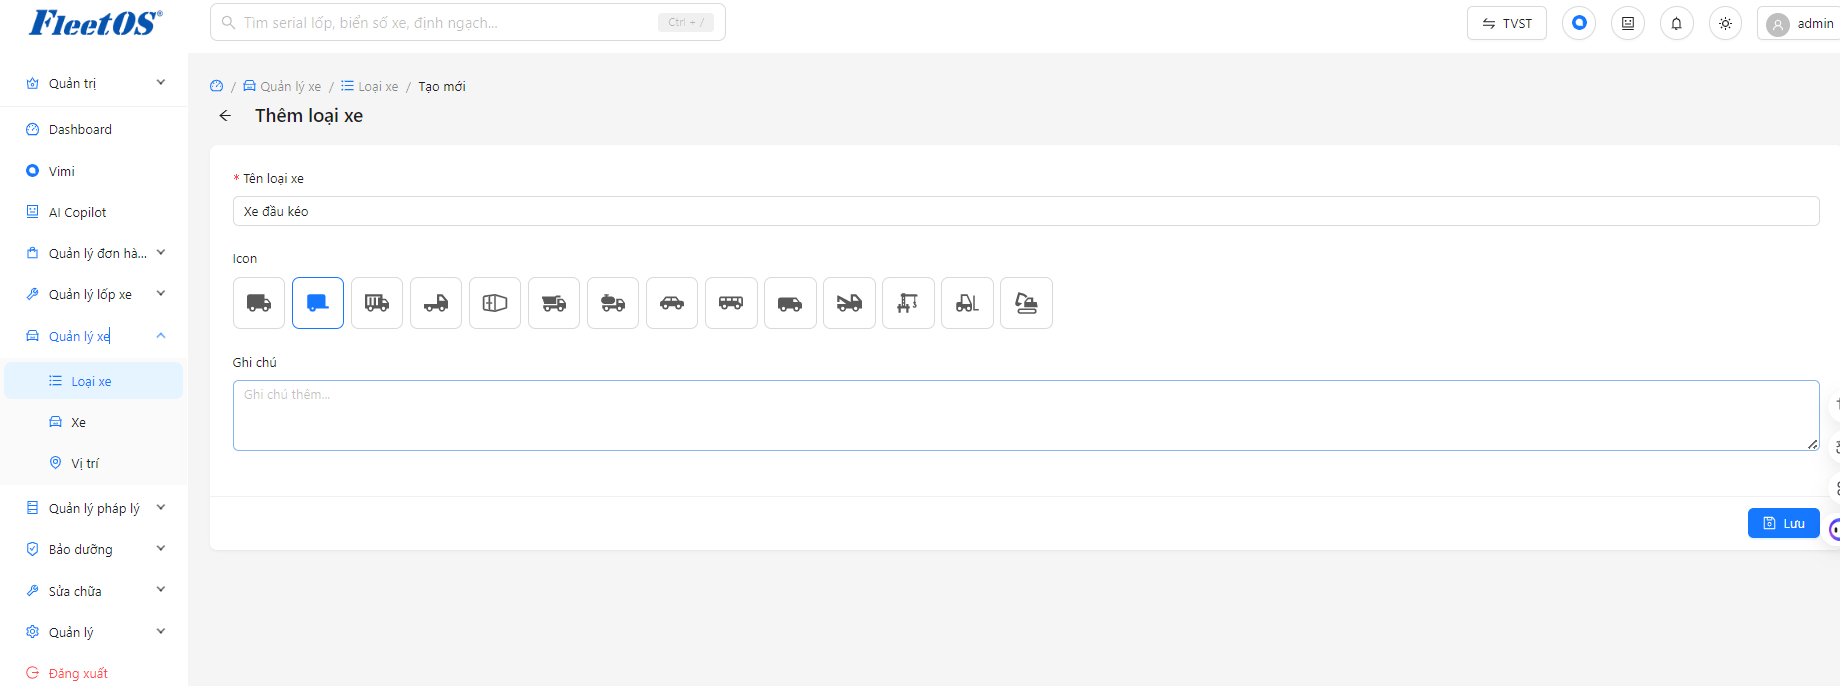
At the “Add vehicle type” screen, fill in the required information in the Vehicle type name field (eg: Truck, Tractor, Trailer…).
Step 3
In the Icon section, click to select a graphic icon that best simulates the style of the vehicle type you are declaring.
Step 4
Add more detailed description information in the Notes box (if necessary).
Step 5
Click the green Save button in the bottom right corner to complete the new addition, the system will record and display this vehicle type in the total list.
Add vehicle type
Manage vehicle list
Step 1
Go to the Vehicle Management menu → Select Vehicles to access the vehicle list screen.
Step 2
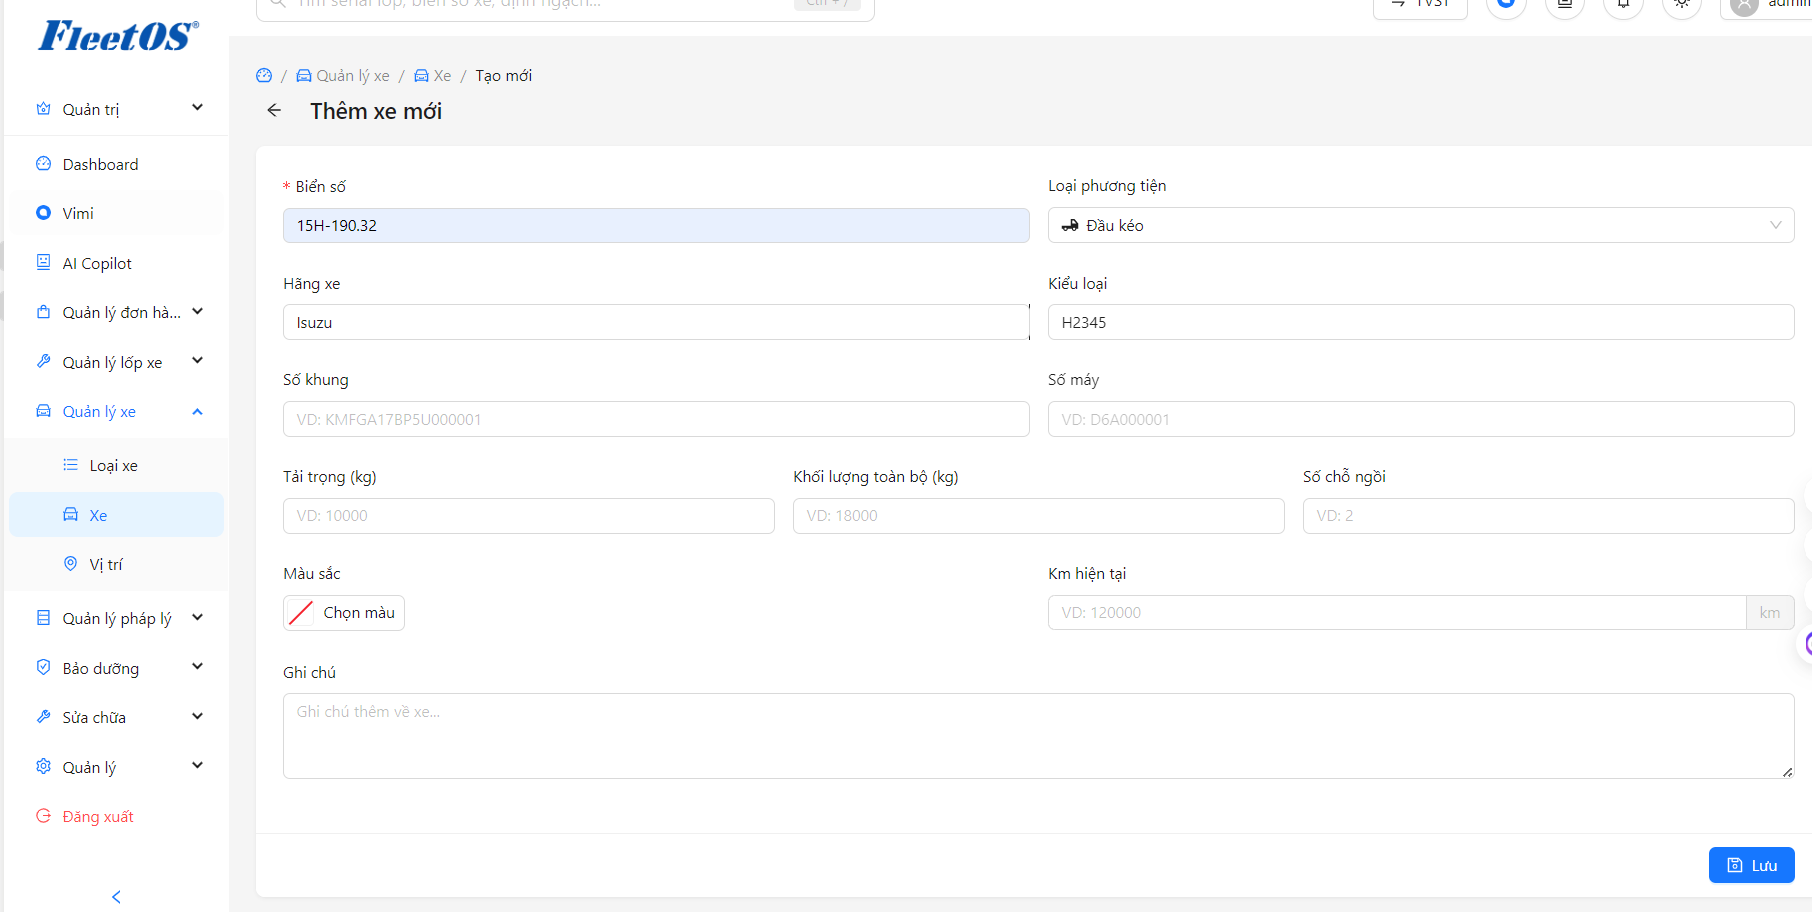
To add media, click the Create New button (blue right corner). Fill in all identification information (License plate, Vehicle type, Frame number, Engine number…), technical specifications and click Save.
Step 3
To look up or update, find the vehicle in the list and click the eye icon (to see details) or the pen (to edit) in the Actions column.
Step 4
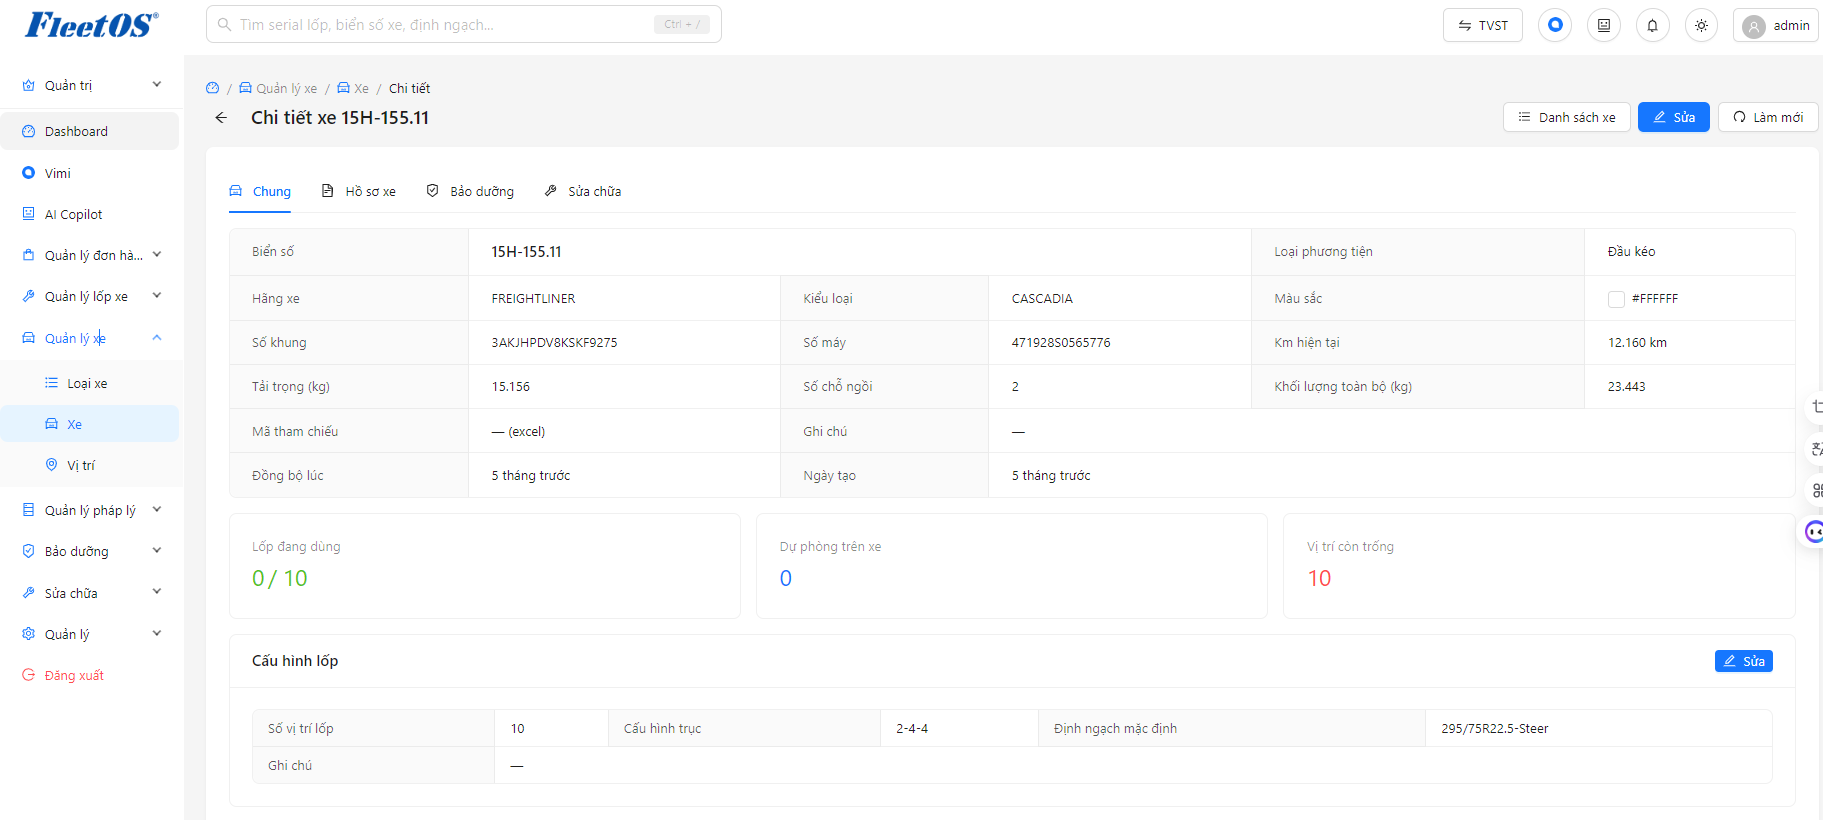
At the “Vehicle details” screen, check the parameters in the General tab. If you need to change profile information, click the Edit button in the upper right corner of the screen. Switch to the Vehicle Records, Maintenance, or Repair tabs to look up relevant history.
Step 5
In the details screen, scroll down to the Tire Map section to see how many tires are in use/empty. You can click Edit in the Tire Configuration section to reset the axle number, or click directly on the tire positions on the diagram to attach/move the tire.
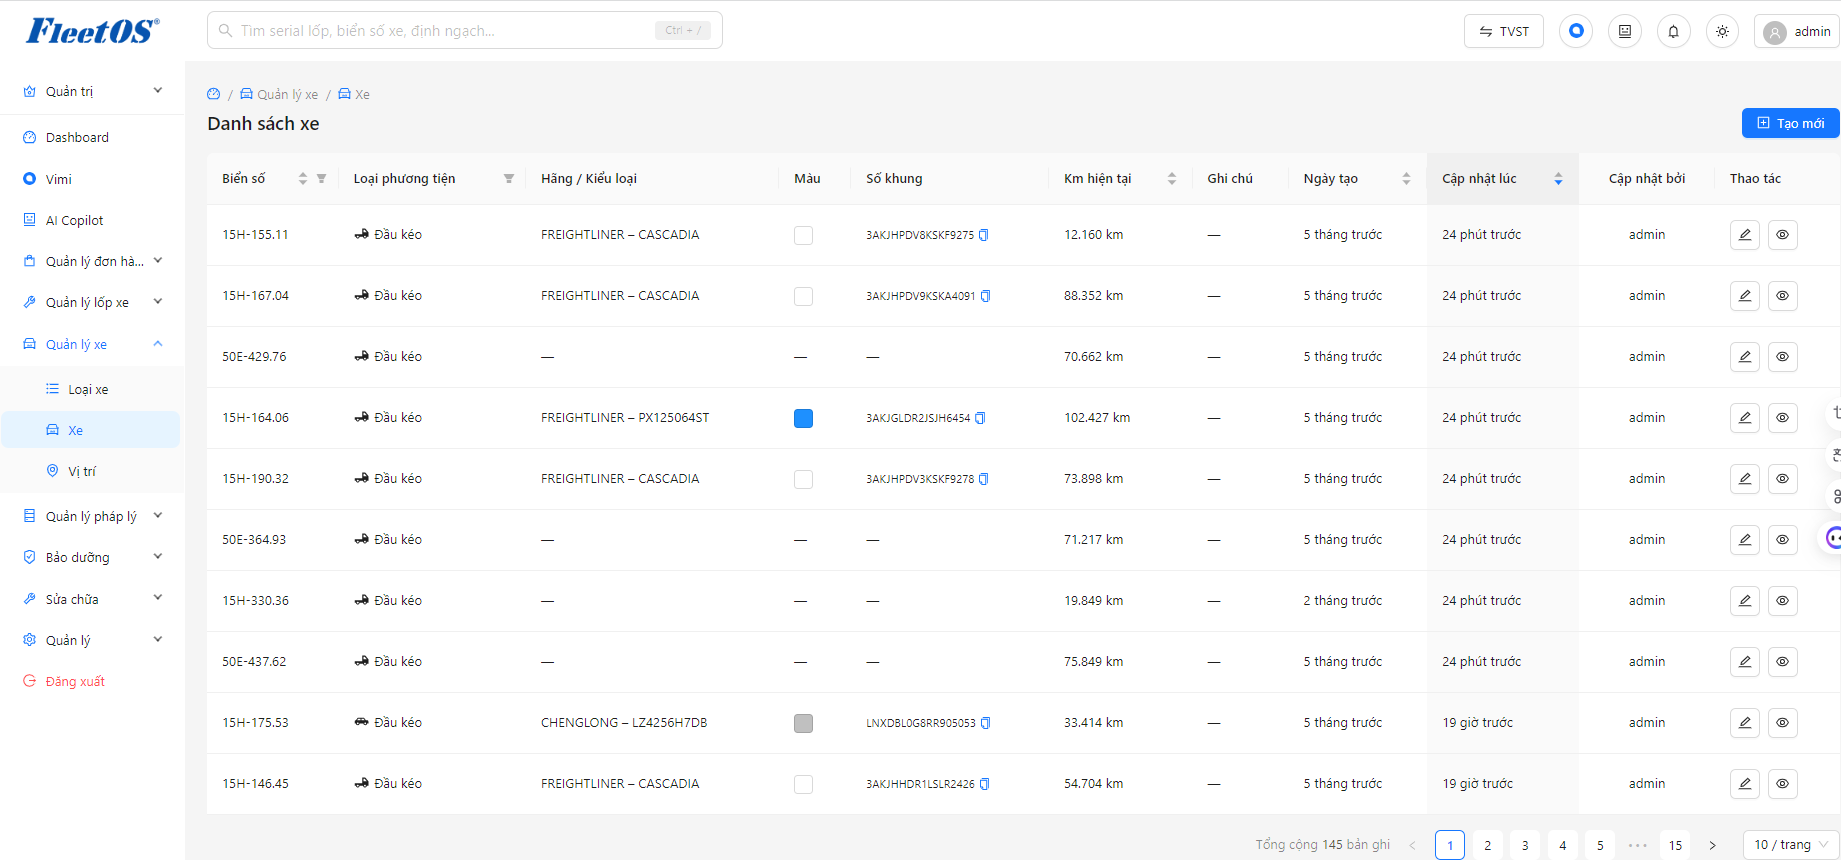
New car added
See vehicle details
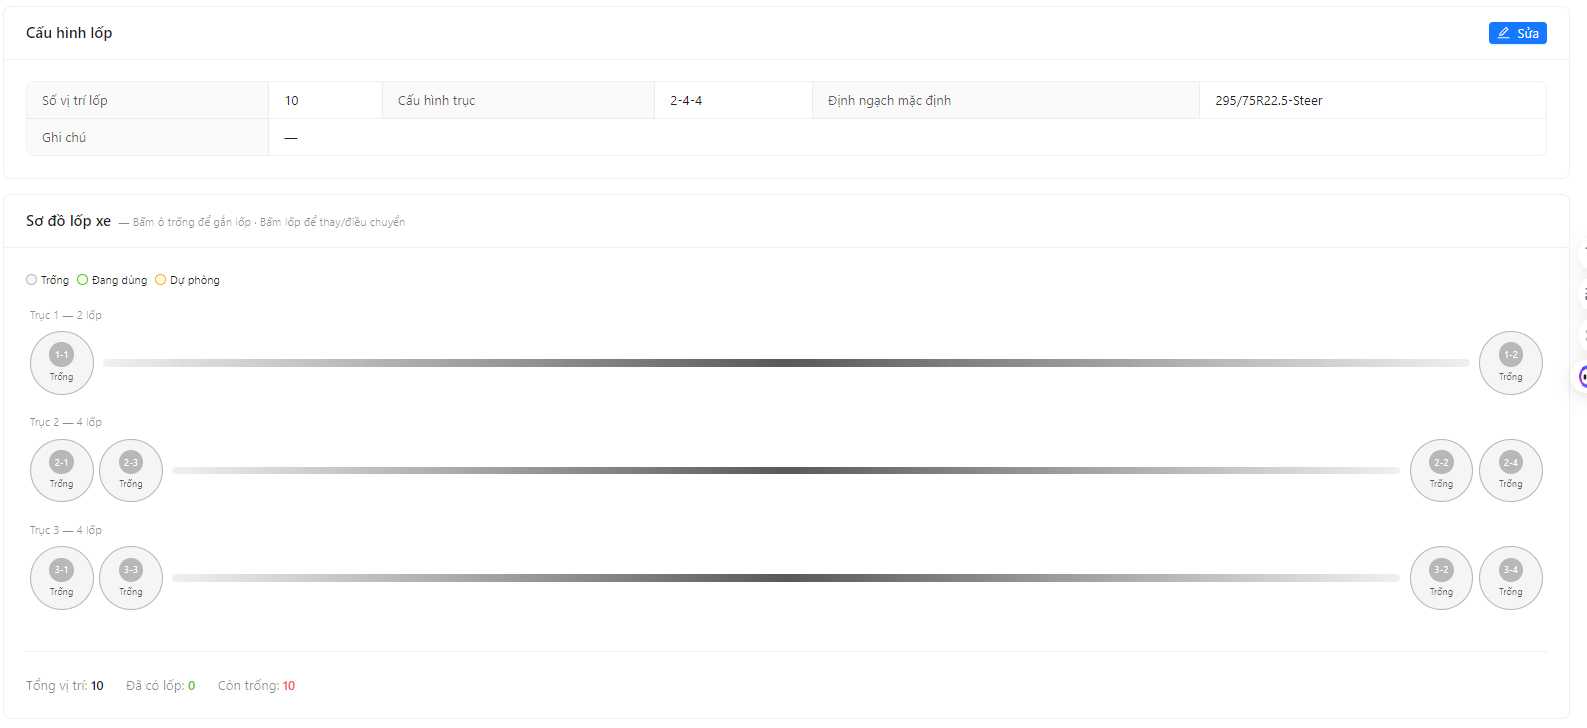
Monitor location and route
Step 1
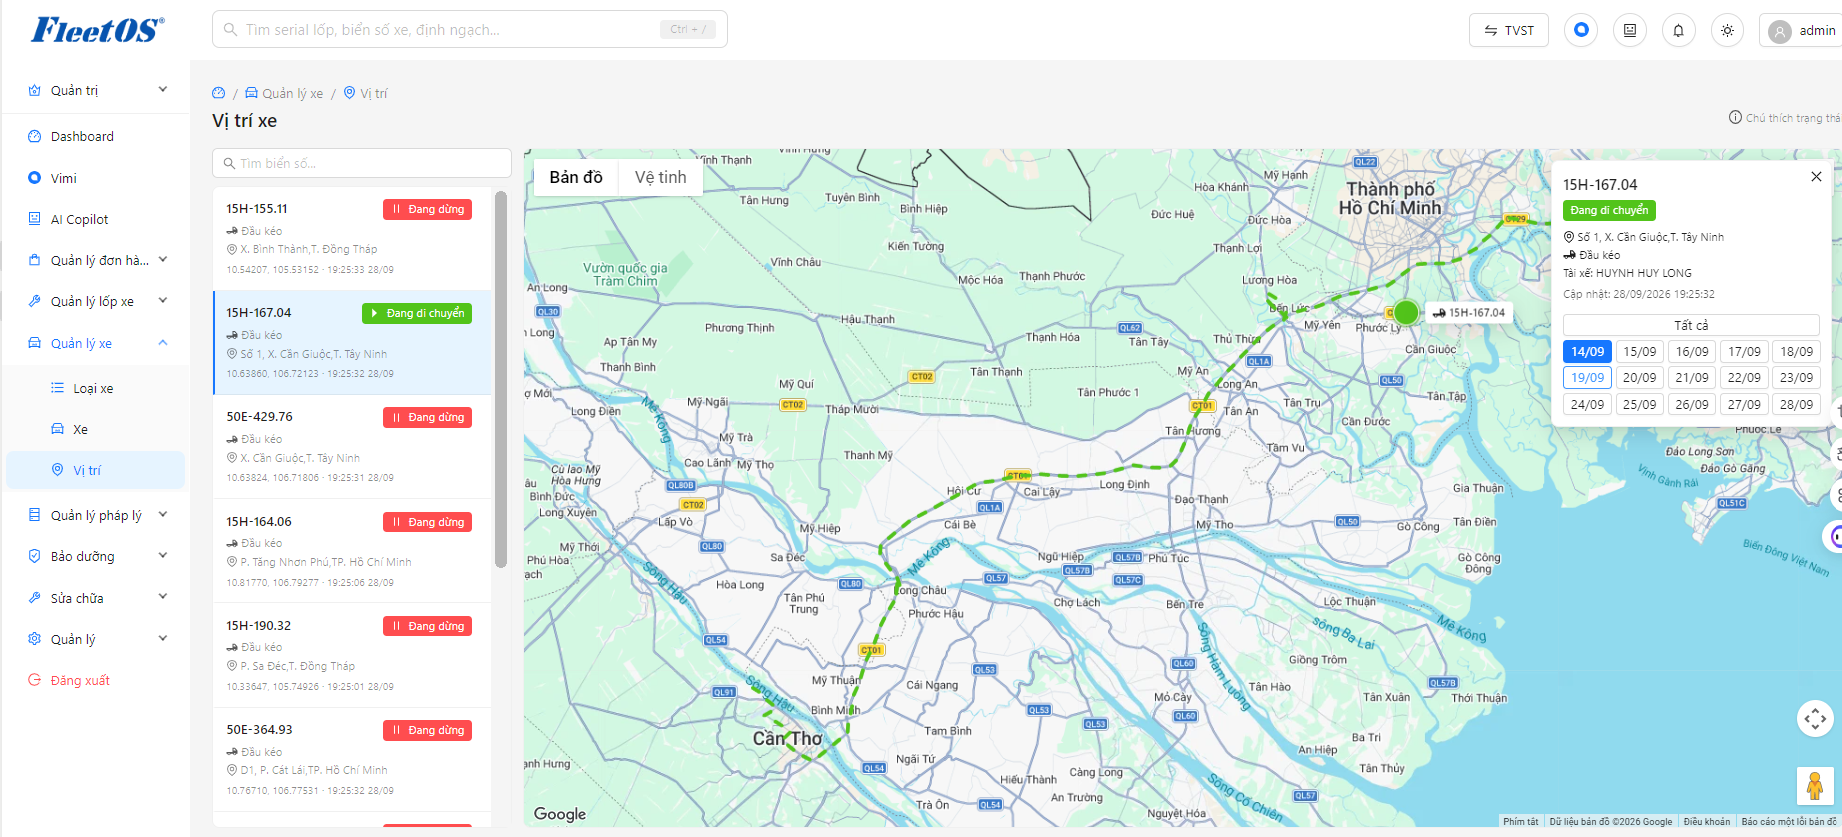
Go to Vehicle Management → Location to open the monitoring map.
Step 2
Follow the list on the left for the actual status (Stopped, Moving) and current location of the entire fleet.
Step 3
Click to select a specific vehicle in the list (or search by license plate) to have the system draw that vehicle’s travel route on the map.
Step 4
At the vehicle information panel in the right corner of the map, click on the date markers to review the travel route history of previous days.