Maintenance and repairs
Tire management
The Tire Management functional group supports transport businesses in tracking the life cycle, status and usage history of each tire.
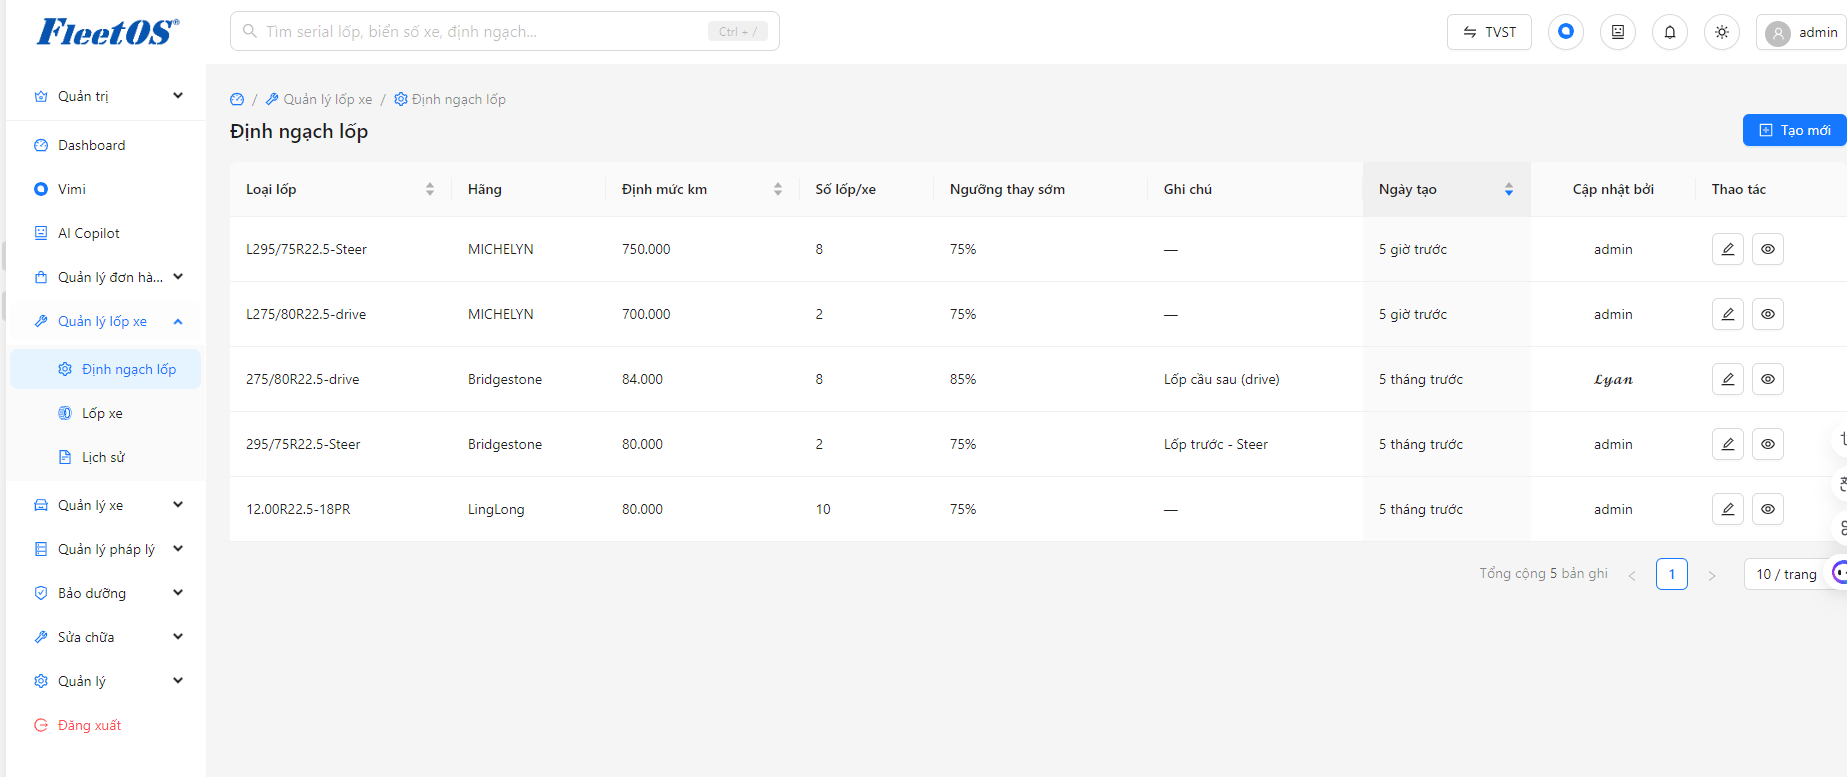
Declare tire quota
Step 1
From the left menu, go to Tire Management → Tire Quotas to see a list of available quotas.
Step 2
Click the Create New button (blue in the right corner) to set parameters for a new tire quota.
Step 3
On the list screen, use the pen icon in the Action column to quickly edit information, or click the eye icon to access the detailed profile of that quota.
Step 4
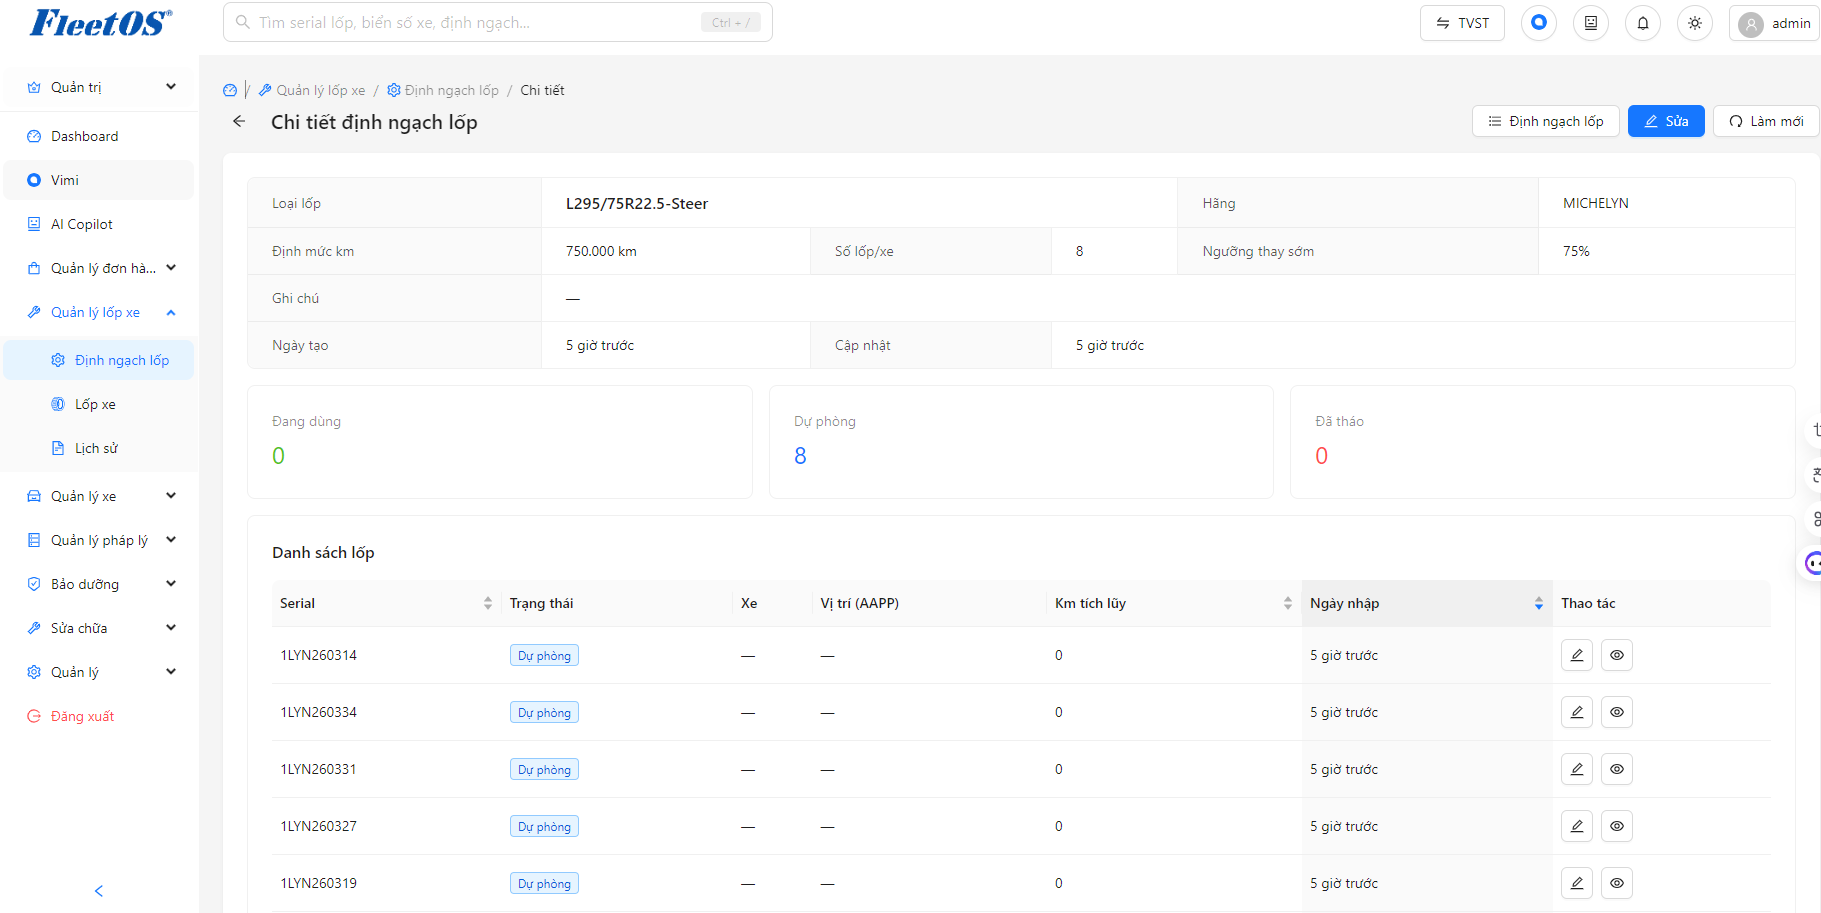
At the “Tyre quota details” screen, you can quickly track the number of tires by status (In use, Reserve, Removed) and manage the list of affiliated tires in the table below.
Step 5
Click the Edit button in the upper right corner of the details screen if you need to update the technical parameters of this quota
See tire quota details
Tire management
Step 1
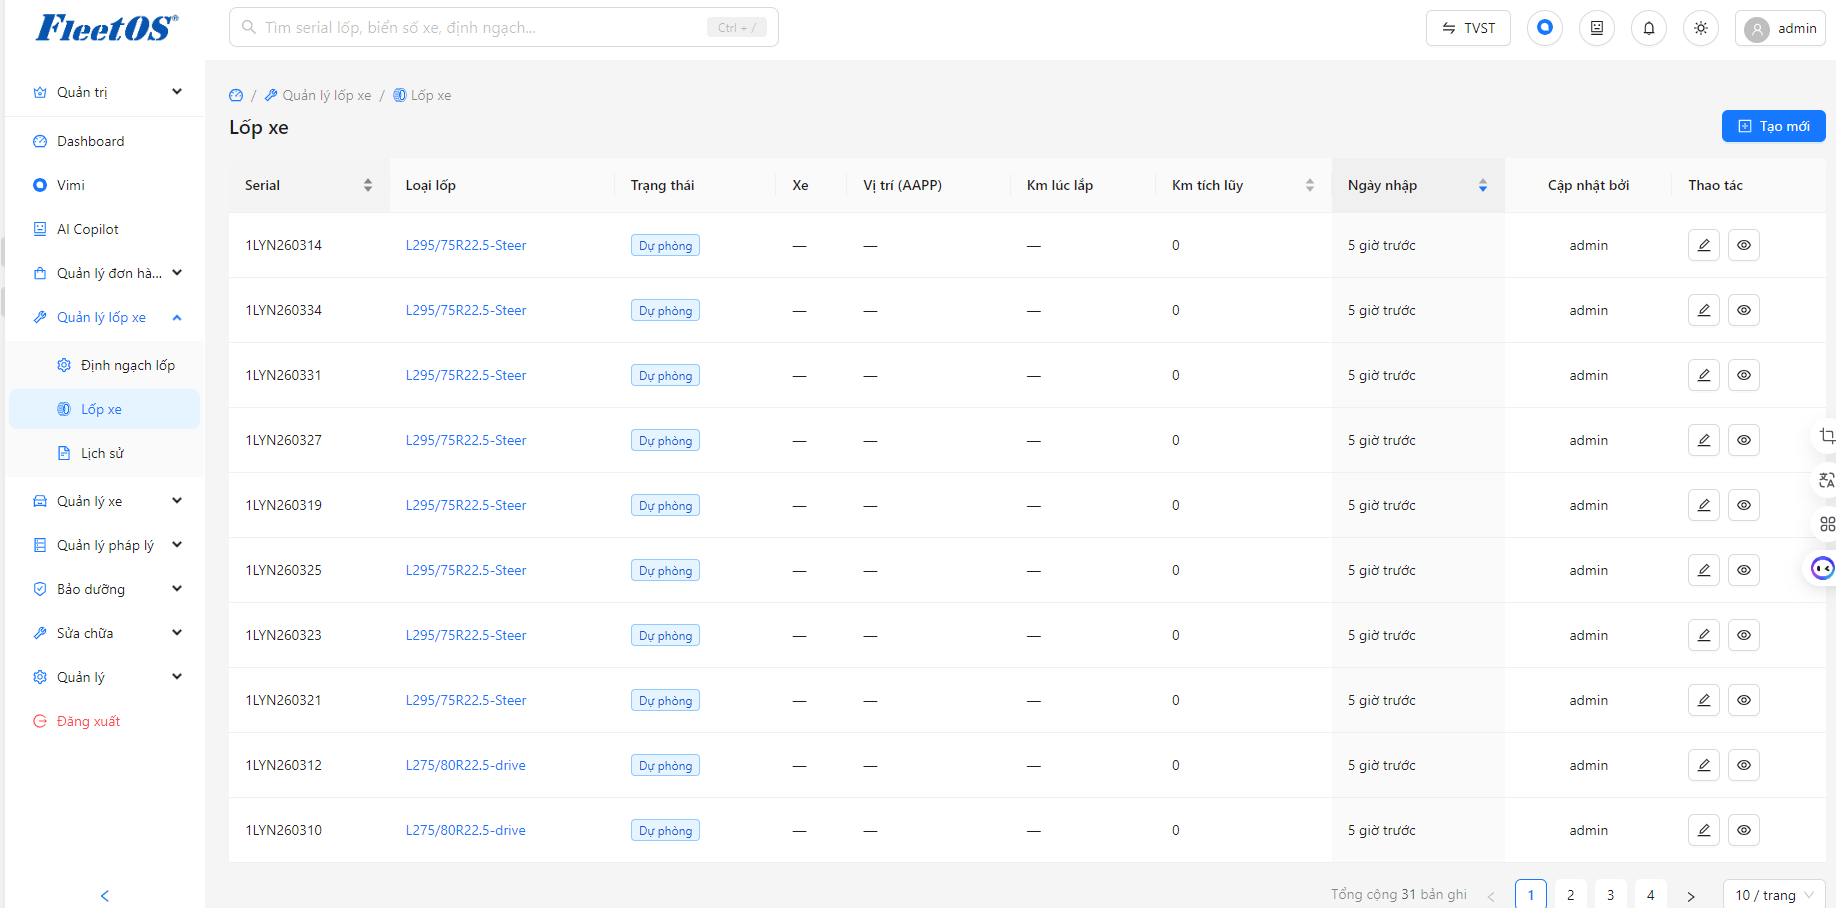
Go to the Tire Management menu → Tires to access a comprehensive list of all tires (managed by Serial) available in the system.
Step 2
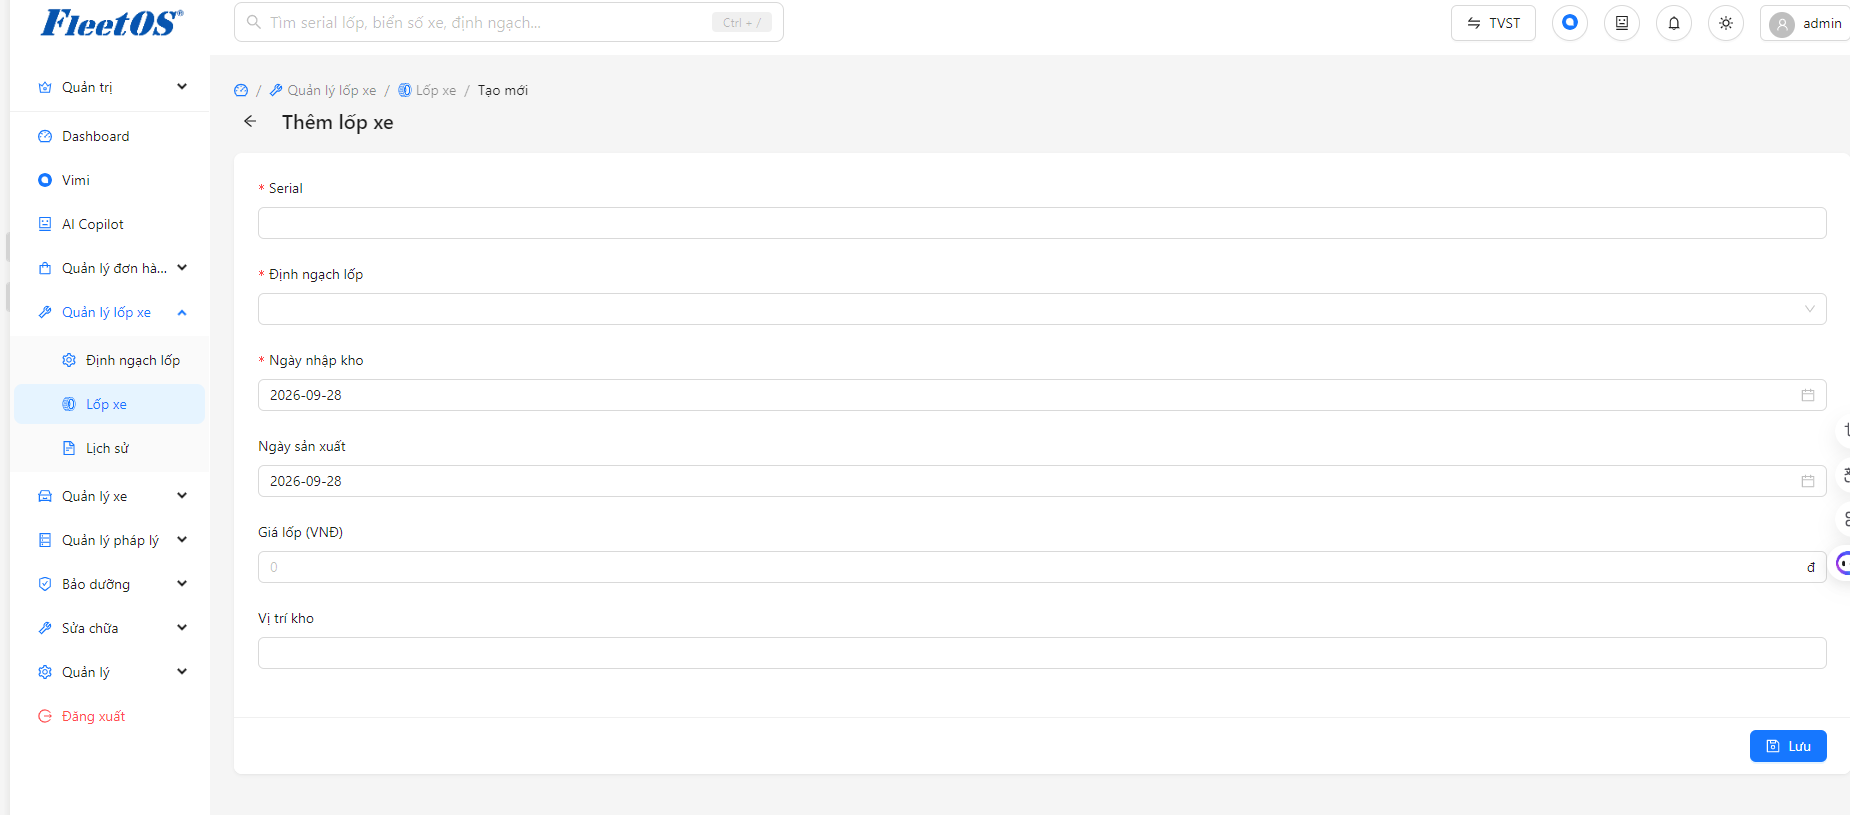
Click the Create New button (blue) in the right corner of the screen to add actual tires to the software.
Step 3
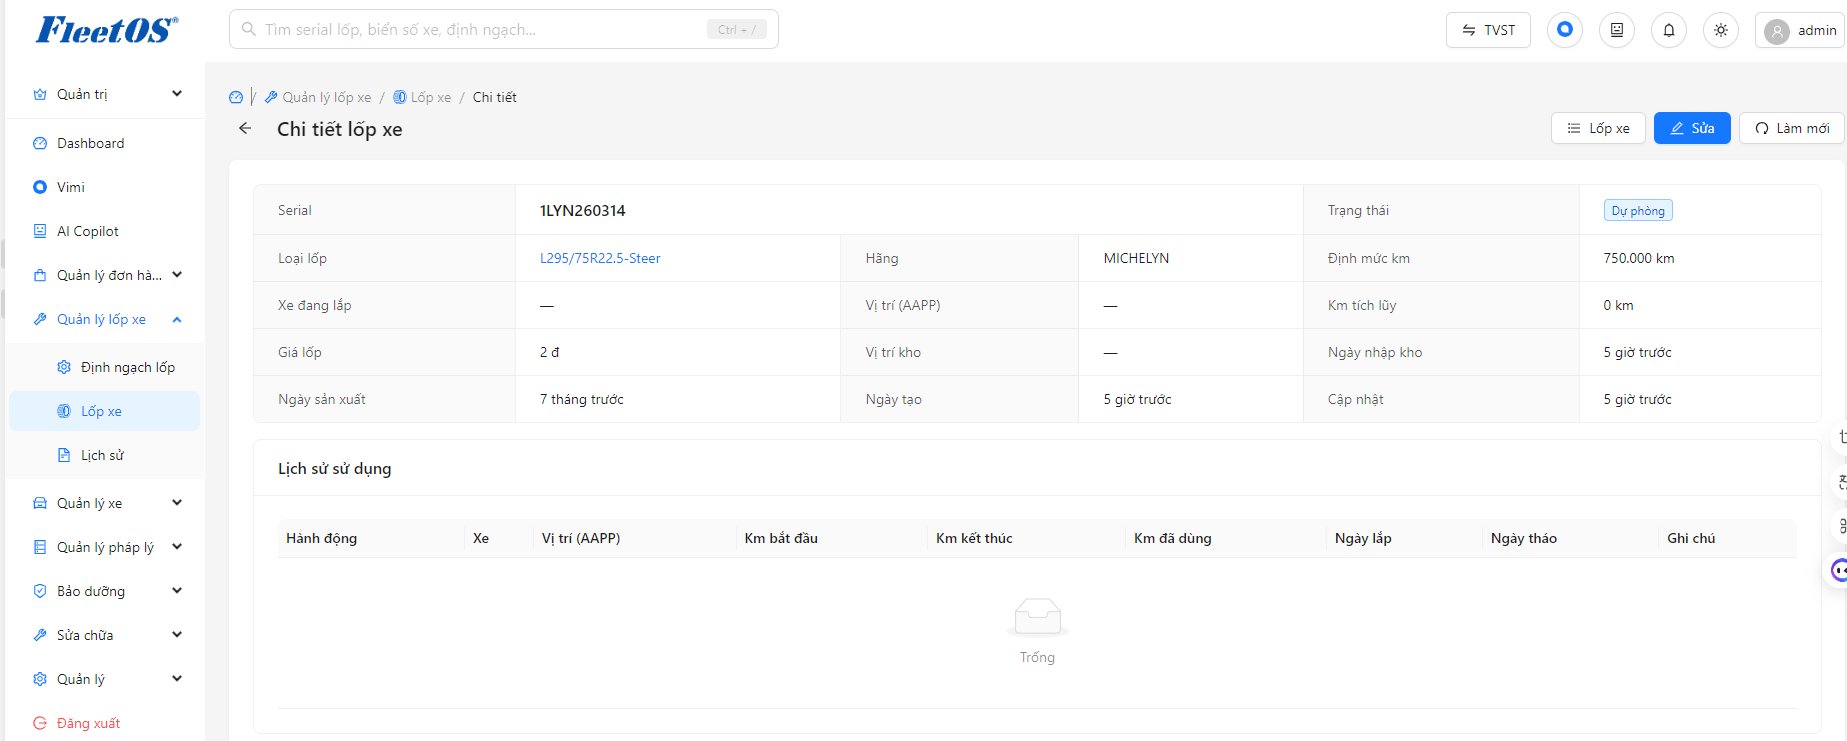
In the list, use the pen icon in the Actions column for quick editing, or click the eye icon to view a detailed profile of a specific tire.
Step 4
At the “Tyre Details” screen, click the Edit button in the upper right corner if you need to update additional information such as Tire Price, Production Date, or Warehouse Location..**
Add tires
See tire details
View tire history
Steps View tire history
-
Method 1 - View the history of a specific tire: Open the “Tyre details” screen of the tire you want to look up, then scroll down to the Usage History table to see the entire mounting/removing process for that particular tire.
-
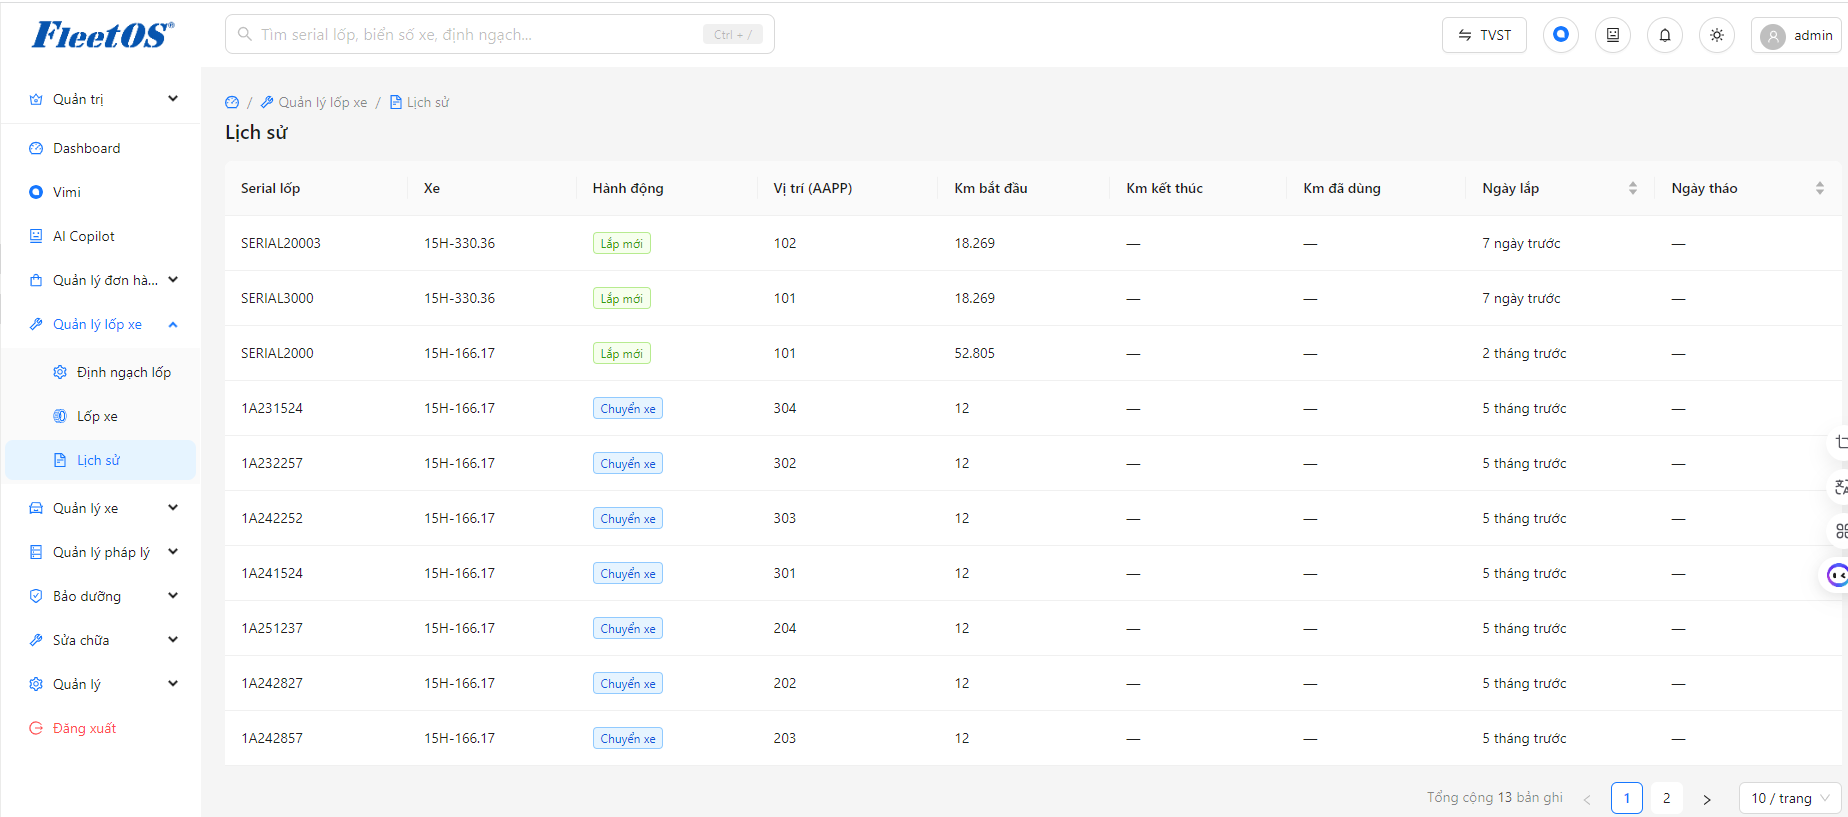
Method 2 - View system-wide history:
-
Step 1: From the left menu, select Tire Management → History.
-
Step 2: Monitor a comprehensive list to control all Actions (eg: New installation, Vehicle transfer) that have been performed on all tires.
-
Step 3: Look up detailed relevant parameters for each rotation including: License plate, Tire position (AAPP), Start/finish km, Used km and Date of installation/removal.
-
Maintenance management
Monitor and schedule periodic maintenance for each vehicle based on number of days or accumulated kilometers.
Declare the maintenance type
Step 1
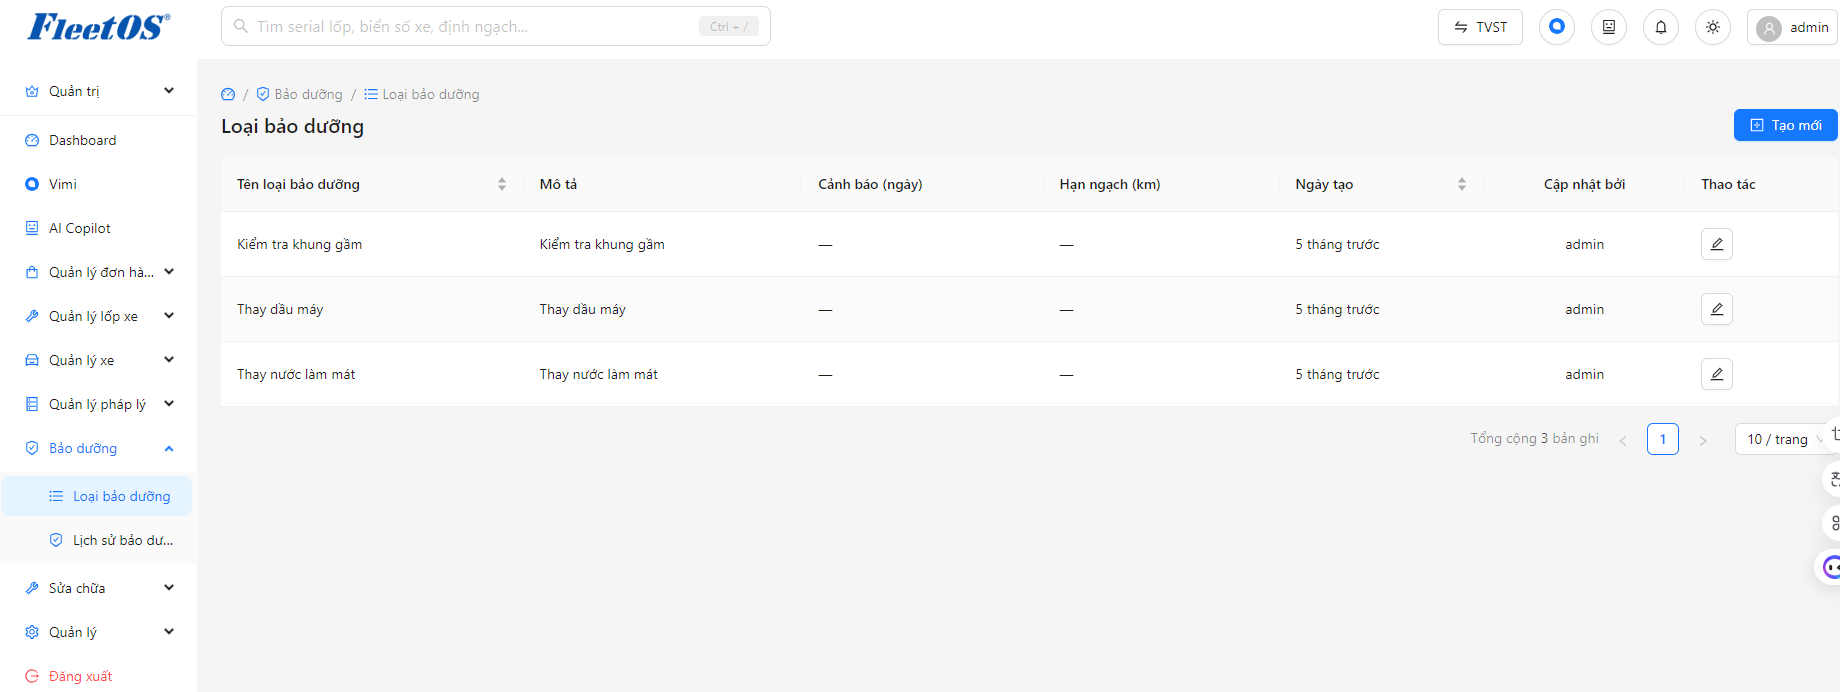
From the left menu, select the Maintenance group → Maintenance type to access the comprehensive list.
Step 2
Click the Create New button (blue) in the upper right corner of the screen to start declaring a new maintenance item.
Step 3
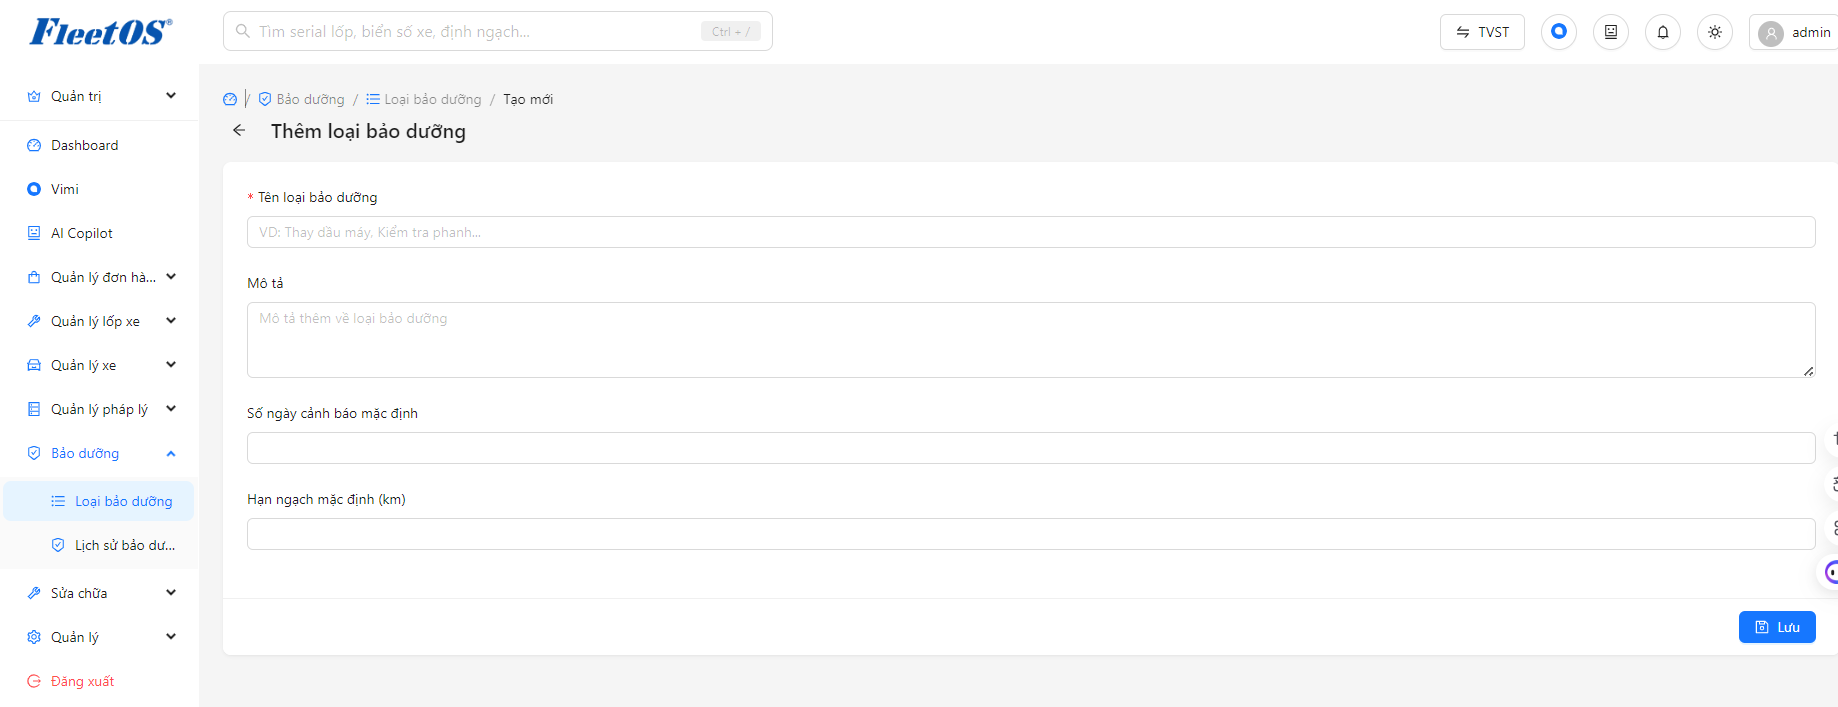
At the “Add maintenance type” interface, enter required information in the Maintenance type name field (eg: Change engine oil, Check brakes…).
Step 4
Enter more details in the Description section, then set reminder parameters in the Default number of warning days and Default quota (km) boxes depending on the maintenance standards of that type of work.
Step 5
Click the Save button in the bottom right corner to complete and save the list to the system. If you need to edit saved maintenance types, you can go back to the list and click the pen icon in the Actions column.
Add maintenance type
View maintenance history
Step 1
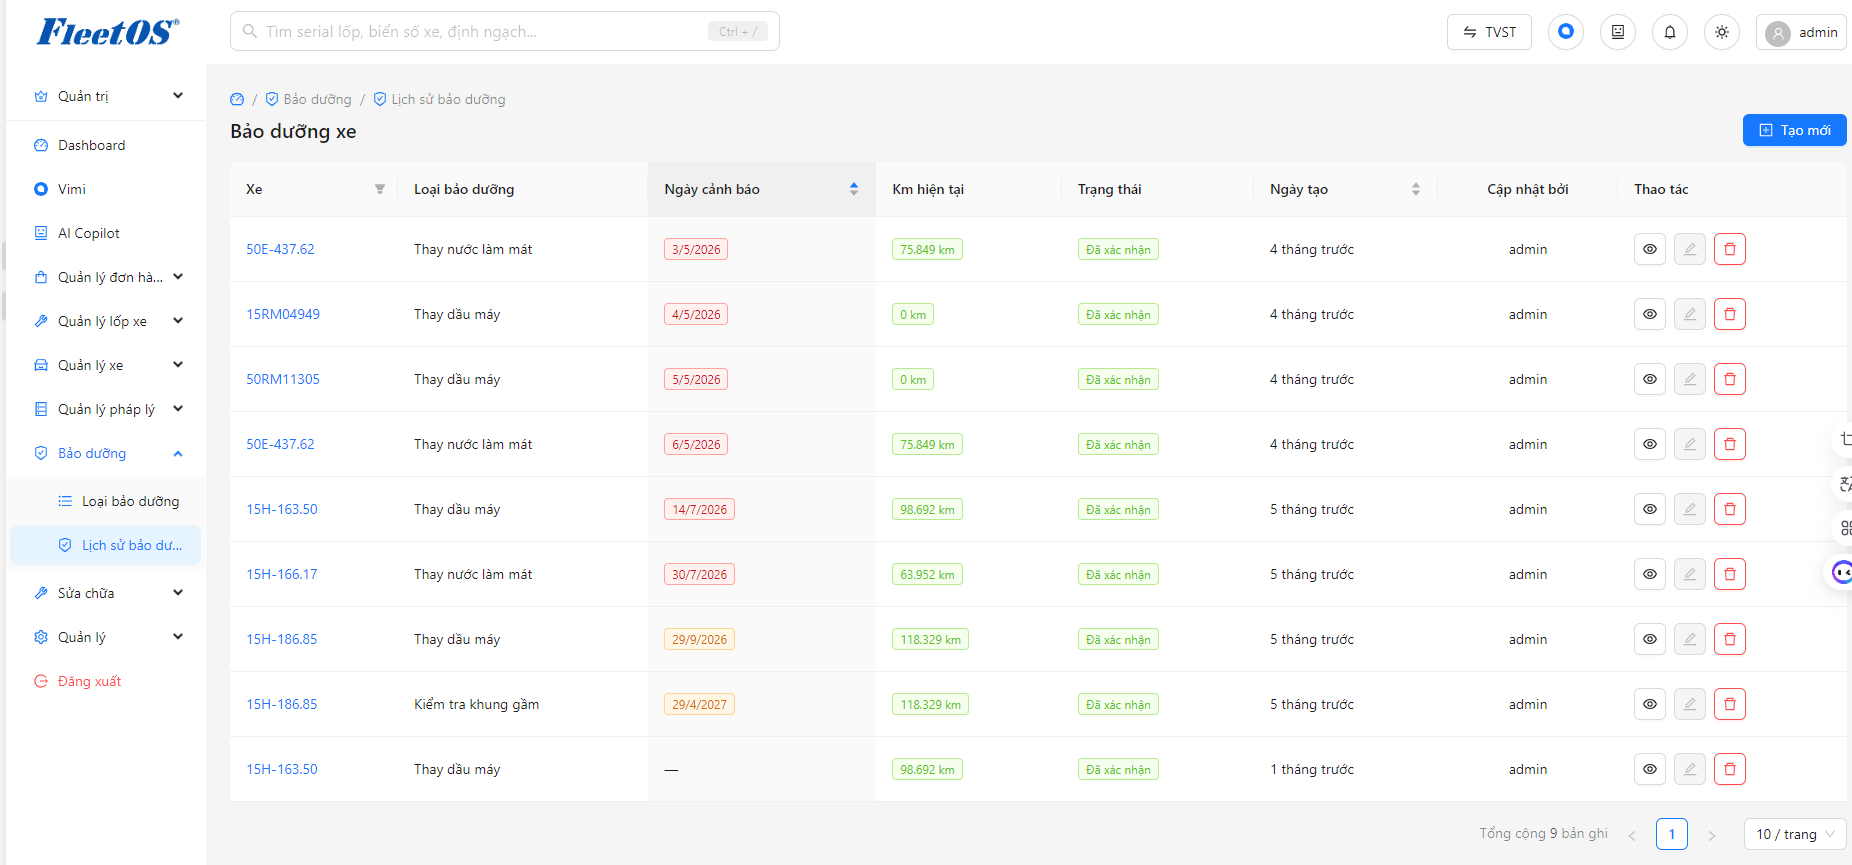
From the left menu bar, select the Maintenance → Maintenance History group to access the list screen.
Step 2
Follow the list to check the status and warning date of the vehicles (due dates are usually highlighted in red). You can click on the license plate in the “Vehicle” column to switch to viewing the vehicle’s detailed profile.
Step 3
To add a new maintenance data, click the Create New button (blue) in the upper right corner.
Step 4
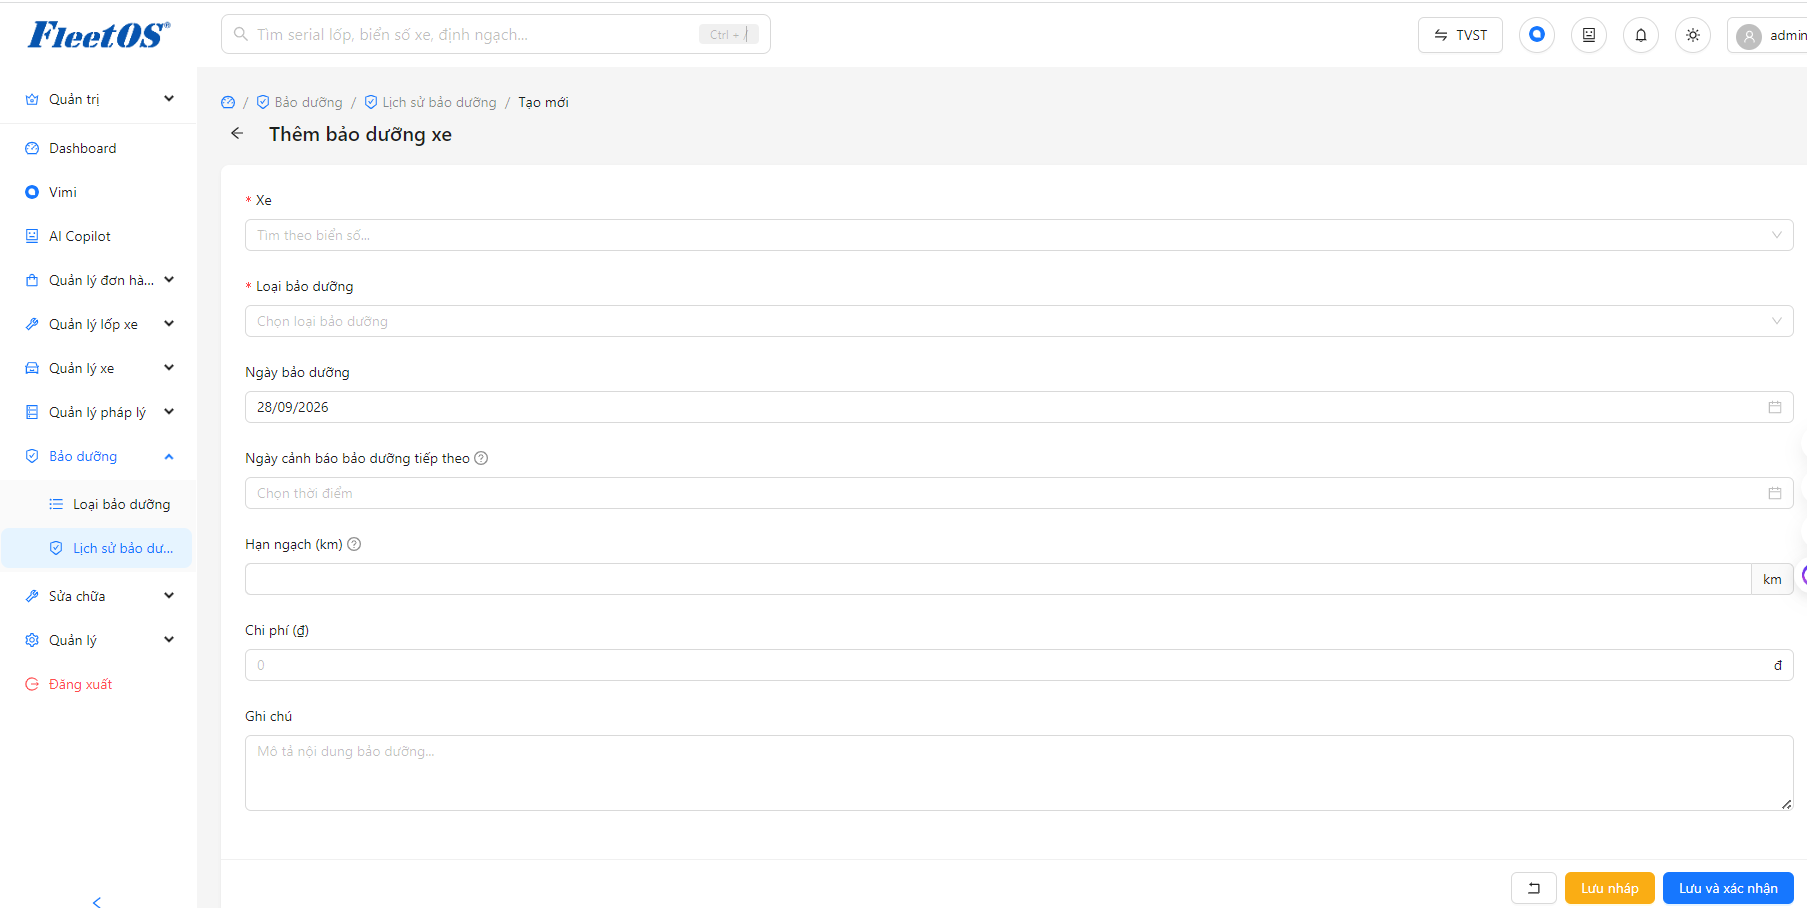
At the “Add vehicle maintenance” interface, select the vehicle in the Vehicle box and specify the corresponding Maintenance Type.
Step 5
Declare relevant parameters including: Maintenance date, next maintenance warning date, Quota (km), Cost and Notes.
Step 6
Click Save draft or Save and confirm to complete the recording.
Add vehicle maintenance
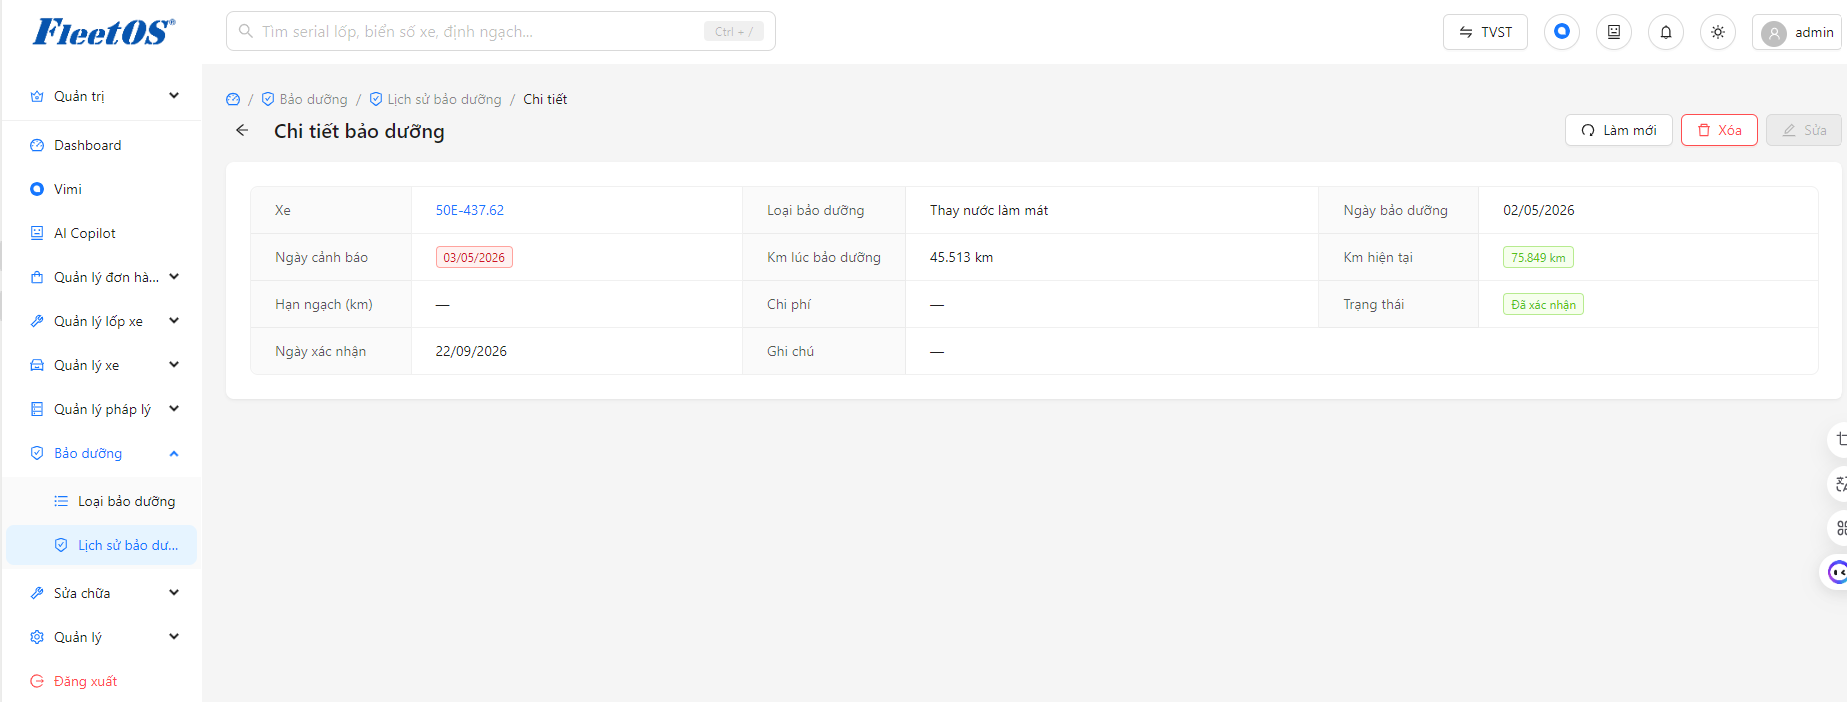
See maintenance details
Repair management
Record and track the entire repair history of each vehicle, with detailed costs.
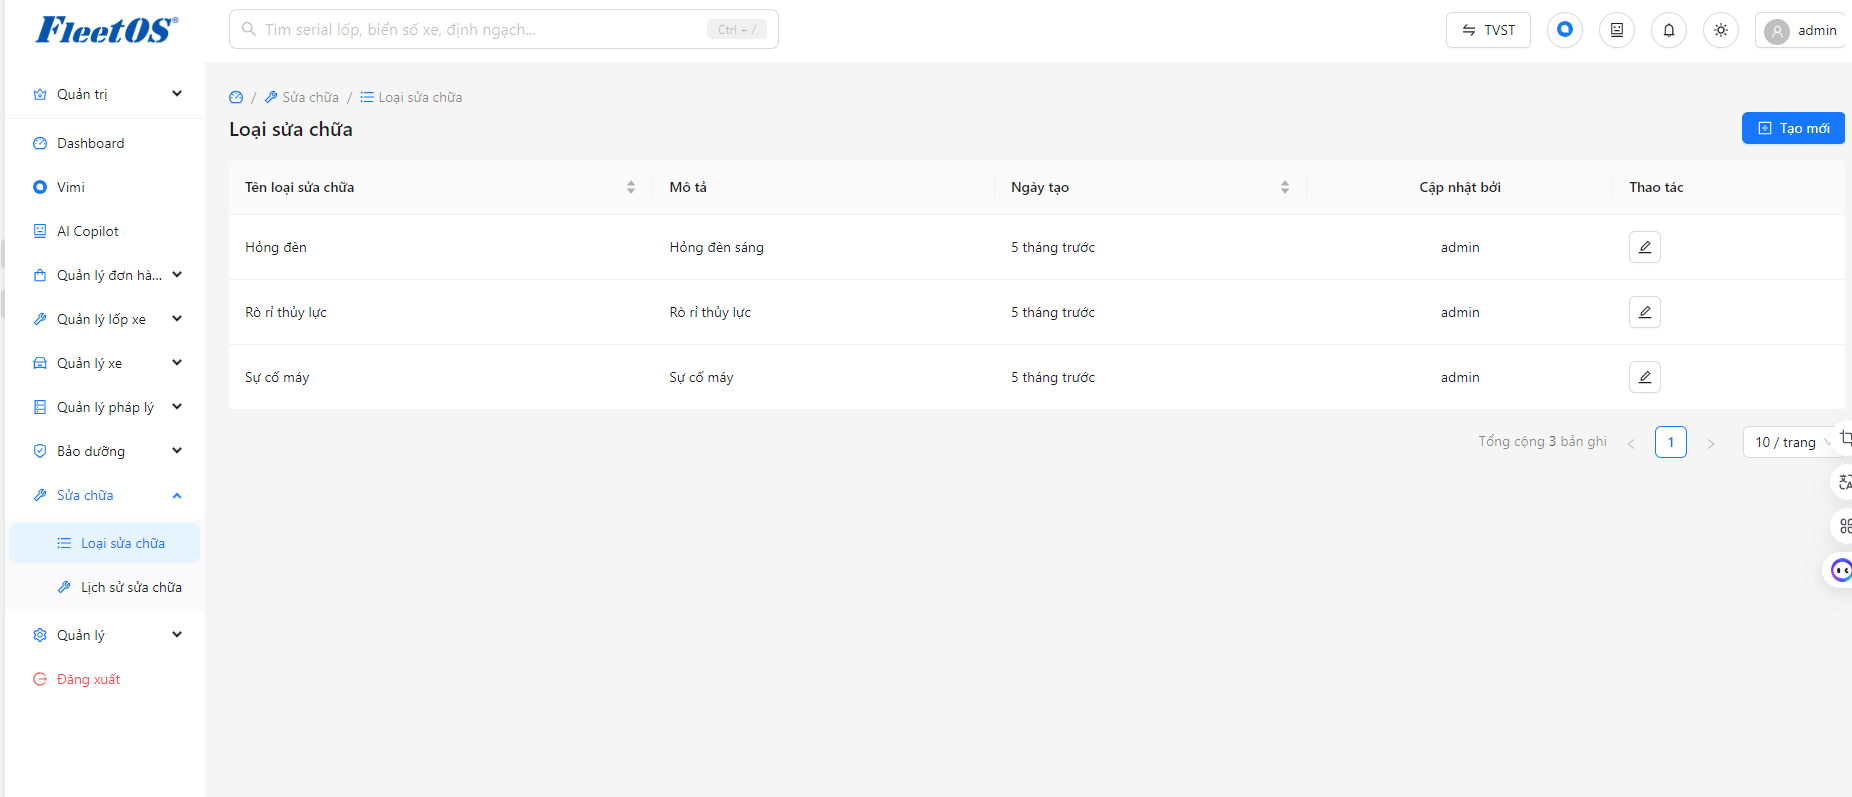
Declare the repair type
Step 1
From the menu on the left, select the Repair group → Repair type to access the items list screen.
Step 2
Click the Create New button (blue) in the upper right corner of the screen to start defining a new repair type.
Step 3
At the “Add repair type” interface, enter required information in the Repair type name field (eg: Broken light, Engine repair…).
Step 4
Add more details to the Description box to clarify this damage item (if necessary).
Step 5
Click the Save button in the bottom right corner to complete the new addition. If you need to change the information of existing repair types, you can return to the list and click on the pen icon in the corresponding Action column.
Add repair type
Repair history
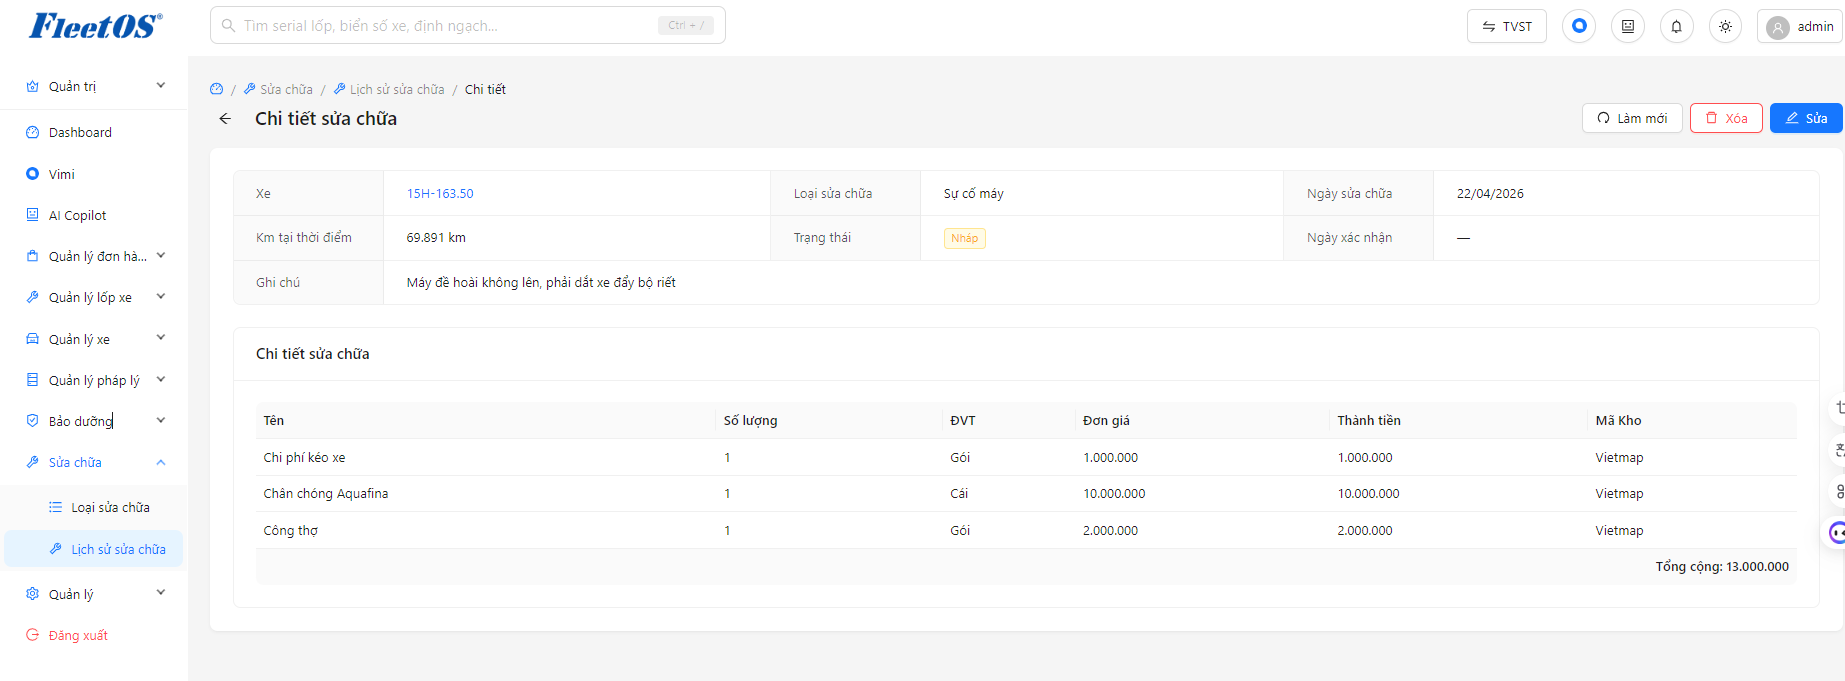
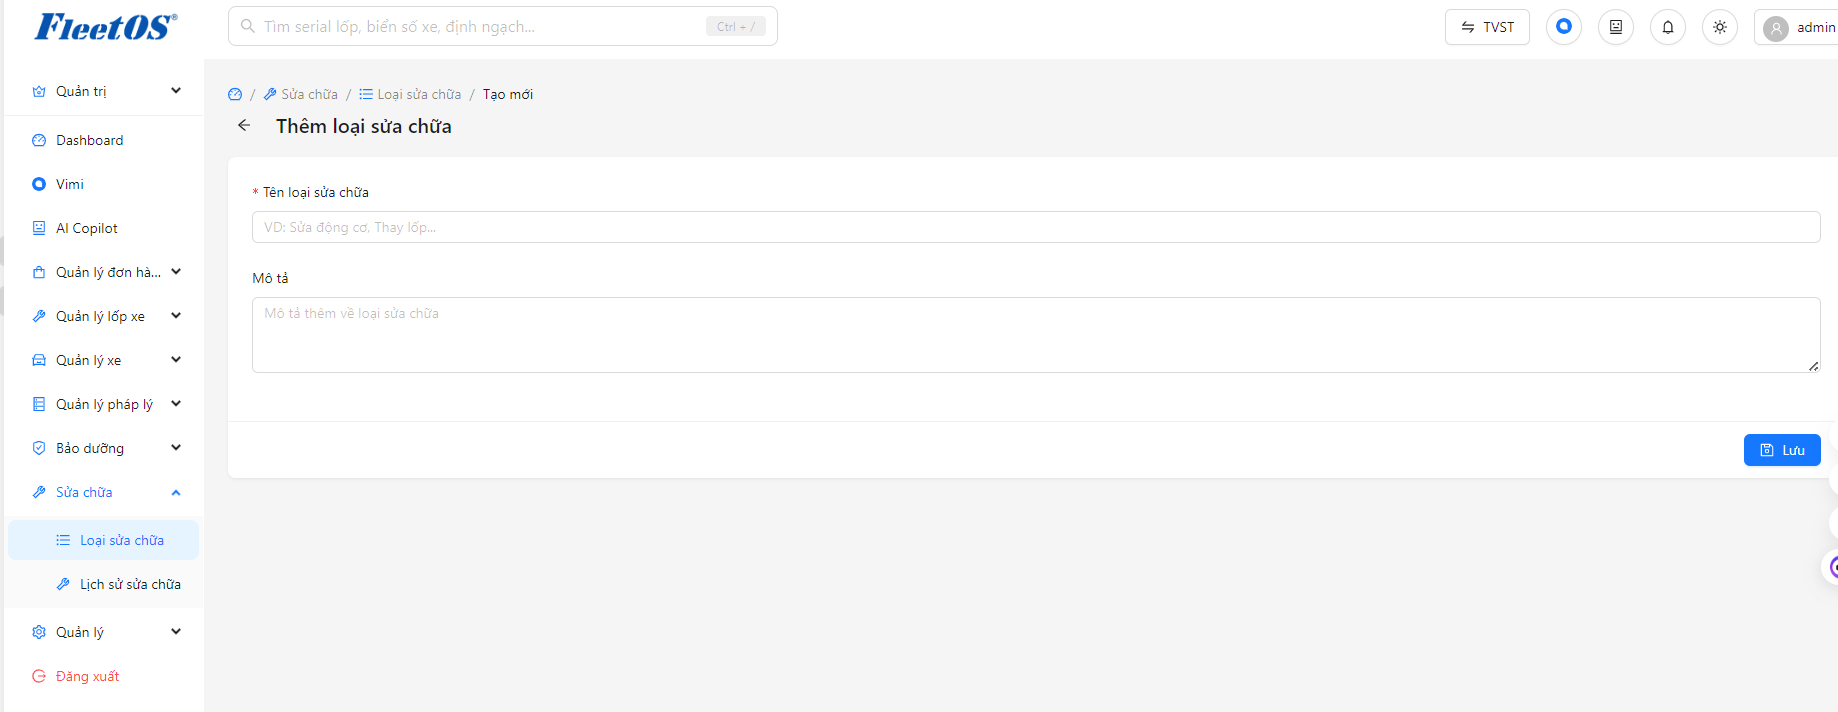
Step 1
From the left menu, select Repair → Repair History to open a list of recorded problems. Here, you can click on the Vehicle name to switch to viewing that vehicle’s profile.
Step 2
To record a new incident, click the Create New button (blue) in the upper right corner.
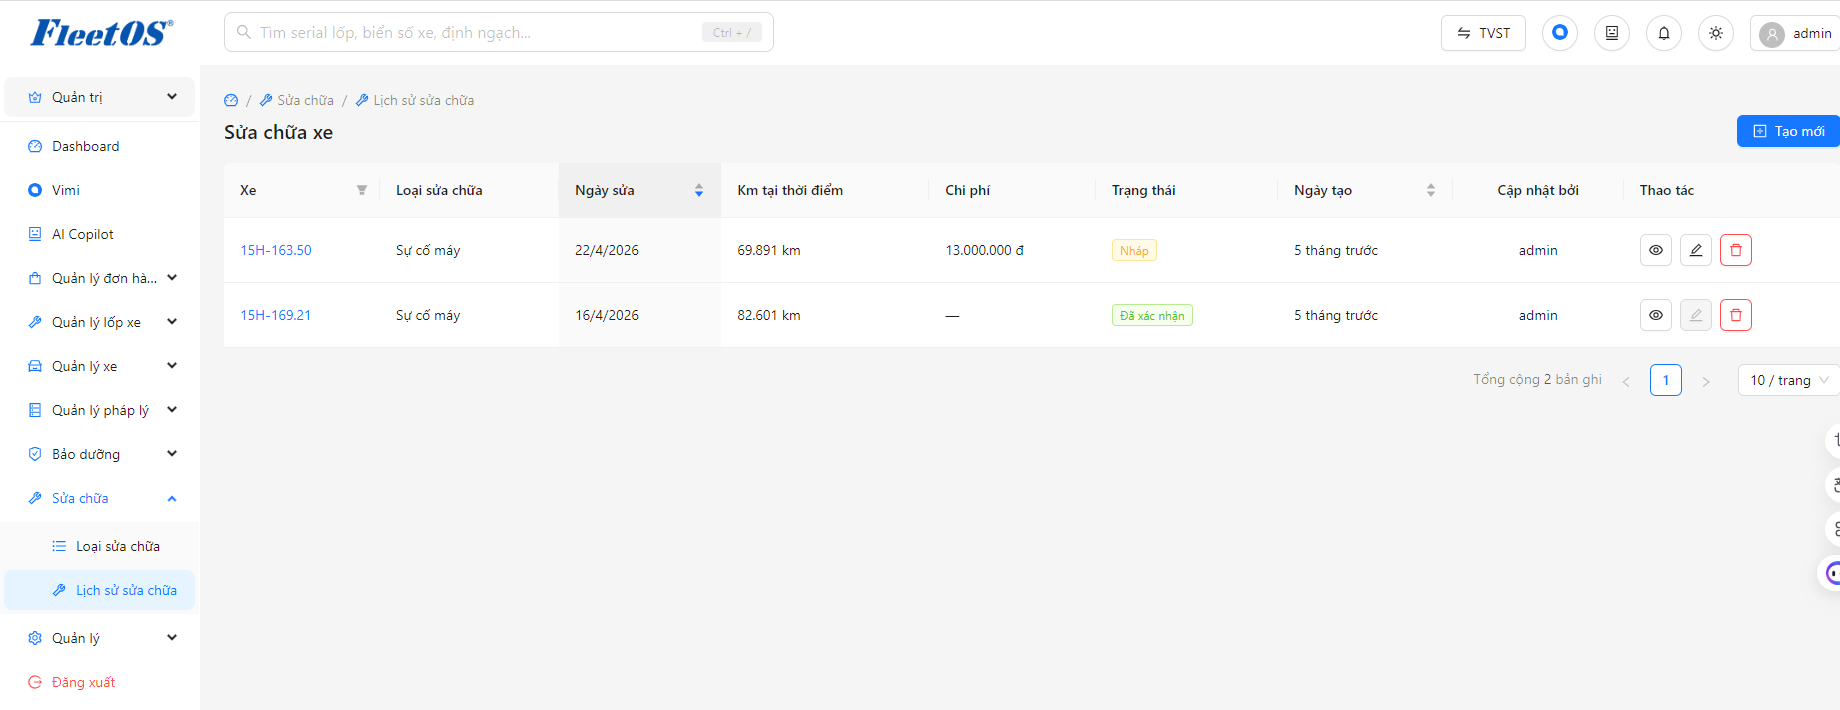
Step 3
At the “Add vehicle repair” interface, select the vehicle having trouble in the Vehicle box and specify the corresponding Repair Type.
Step 4
Fill in the Repair Date and clearly describe the damage in the Notes box (Example: Engine won’t turn on…).
Step 5
In the “Repair details” section, click Add content to list materials or workers (eg: Towing costs, Kickstands…). Enter Quantity and Unit Price for the system to automatically calculate Total Amount and Total Cost.
Step 6
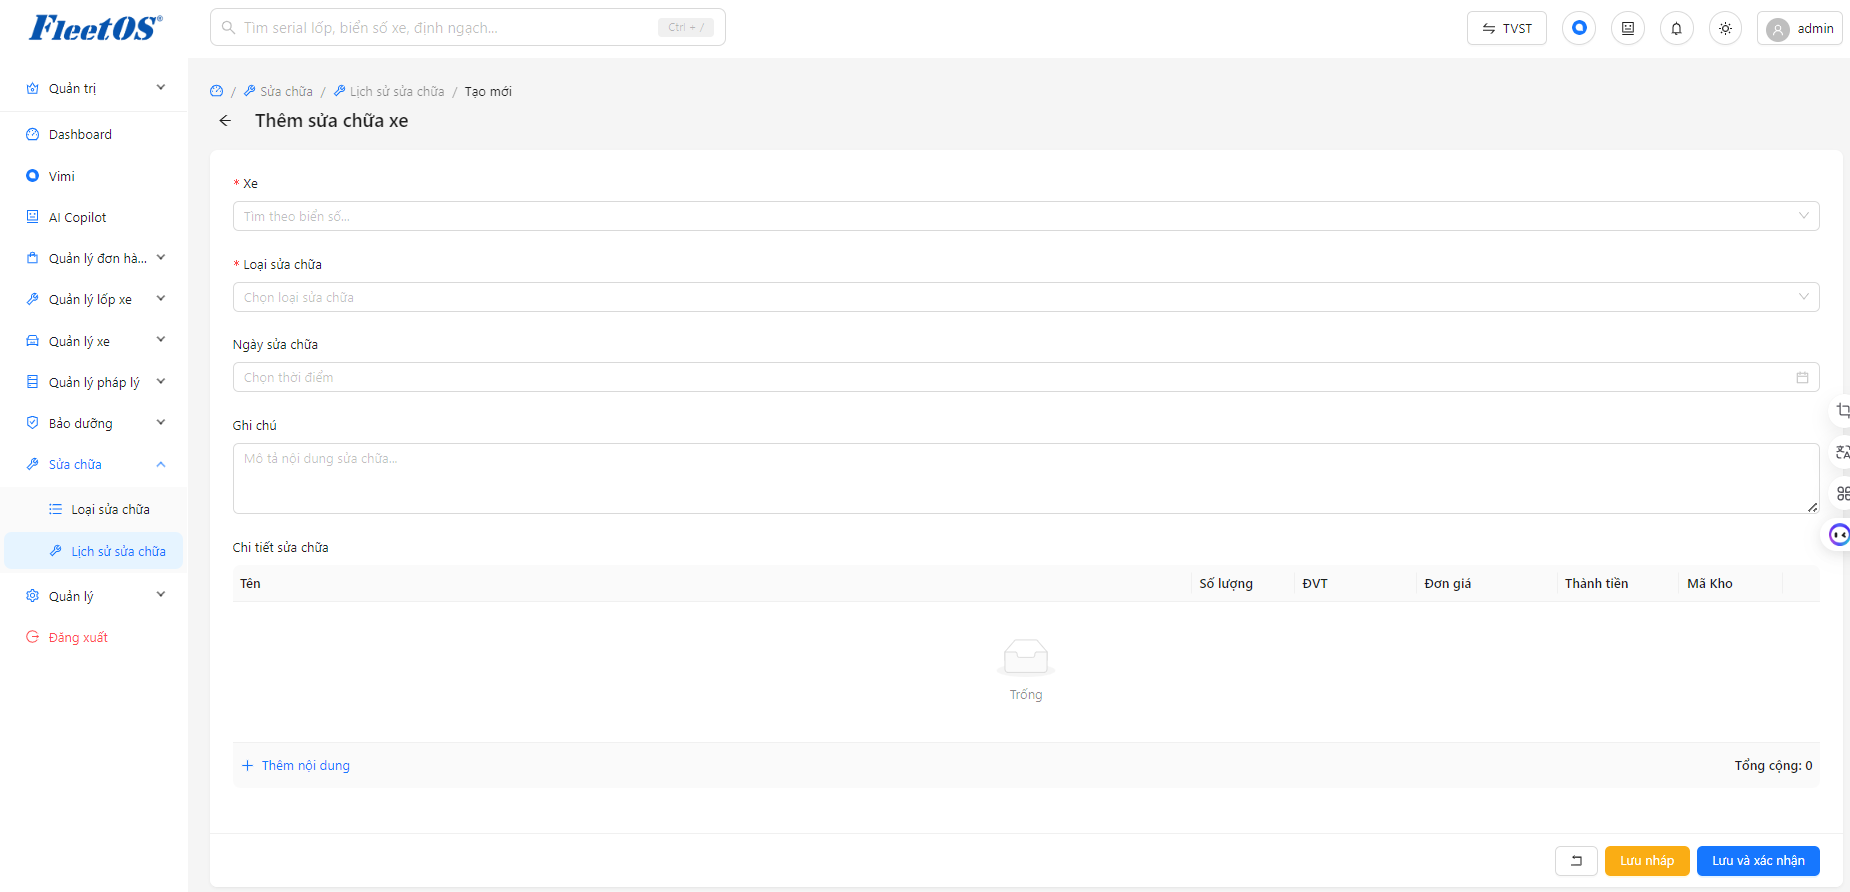
Click Save draft or Save and confirm to complete. You can review or edit this profile later using the icons in the Actions column off the list screen.
Add new fix
See repair details