Order management
Orders
Order management uses AI to synthesize information from Zalo groups, including orders, documents, images and related exchange information, then compile into one order on the system for easy tracking and management.
-
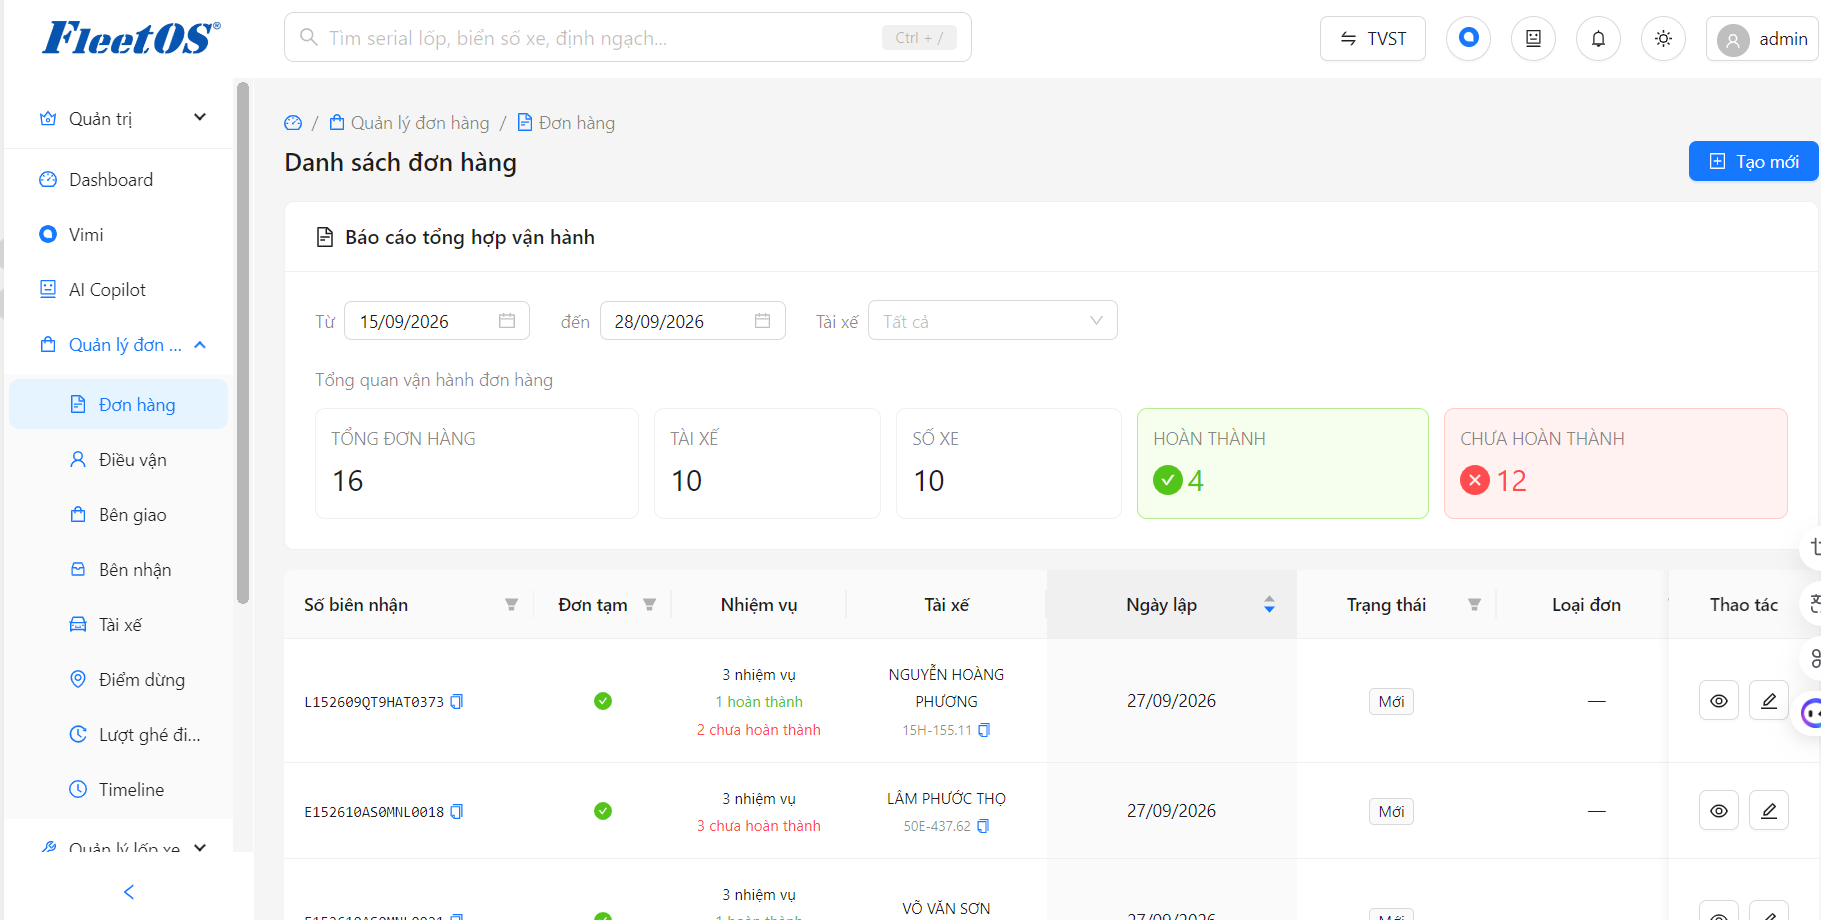
Summary report: Displays indicators such as total number of orders, drivers, number of vehicles, completed and incomplete orders.
-
Filter: Allows filtering orders by time period and driver.
-
Order list: Displays order information, driver, task, creation date, status and type of order.
-
Action: Users can view order details directly from the list.
Usage steps
Step 1
Go to Order Management → Orders.
Step 2
The system displays orders compiled by AI from information on Zalo.
Step 3
Find the order you want to view in the list or click filter receipt number… to find order information quickly
Step 4
Click the eye icon 👁 to see order details.
Step 5
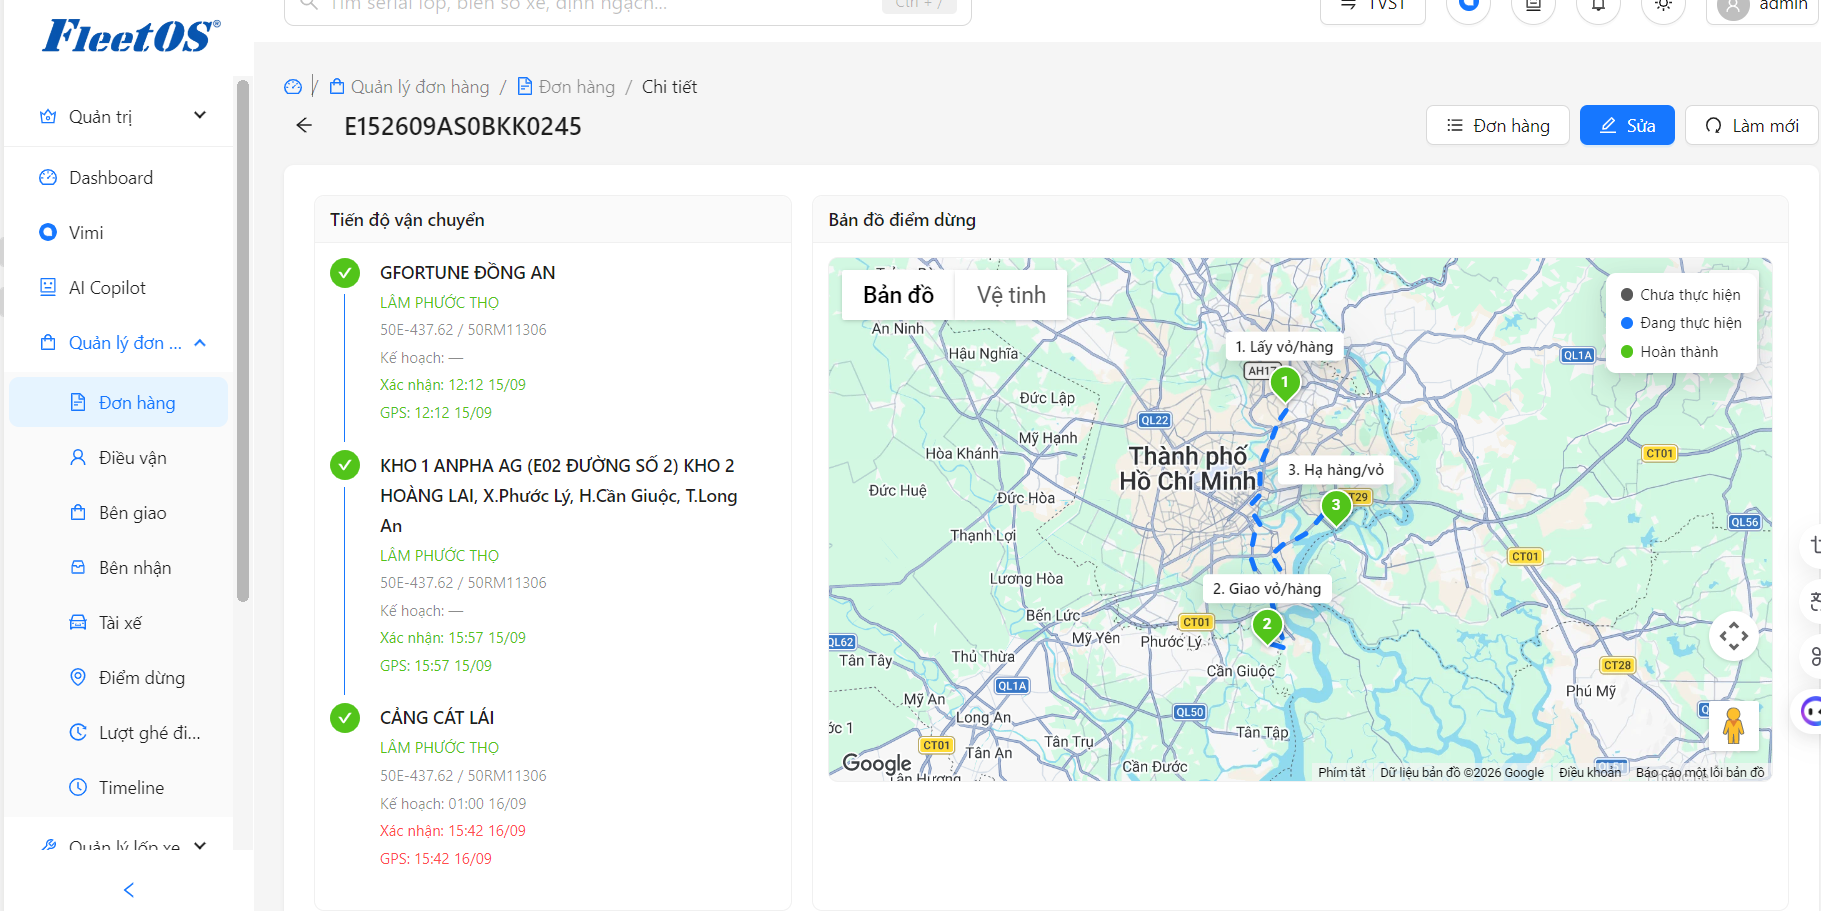
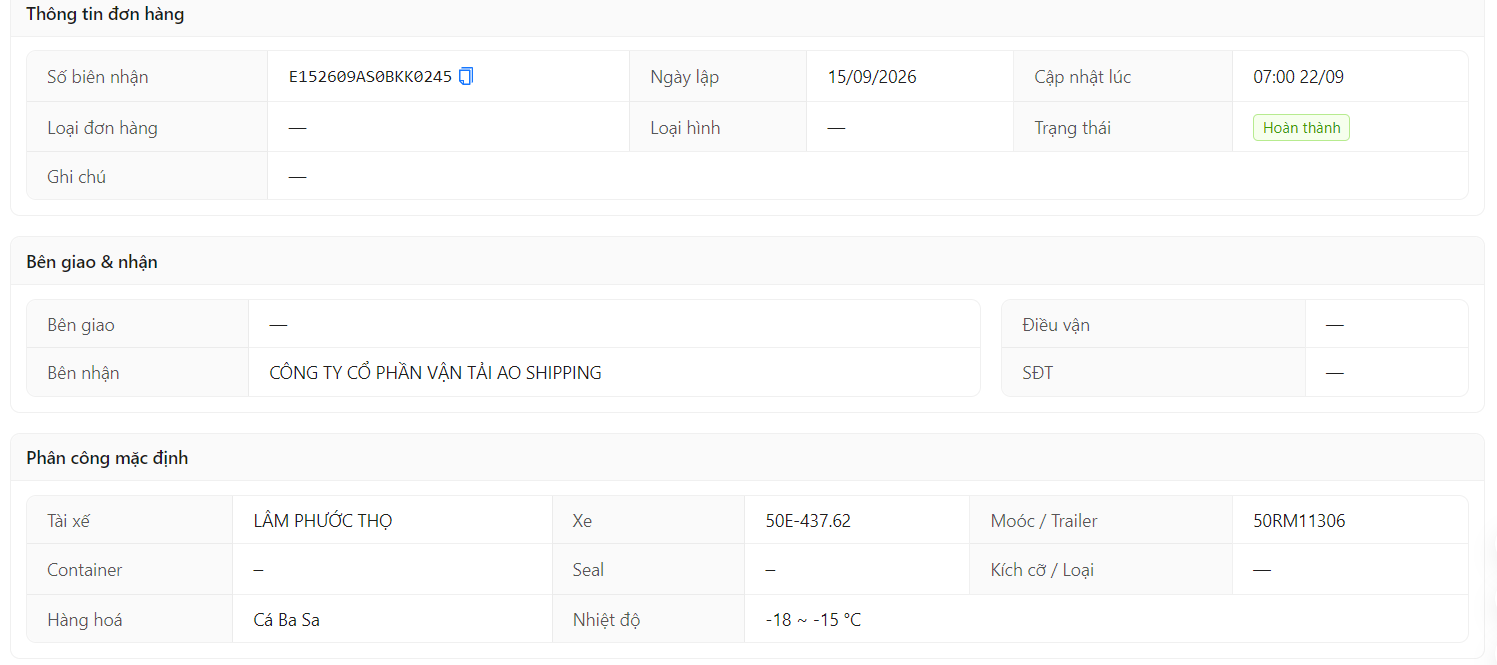
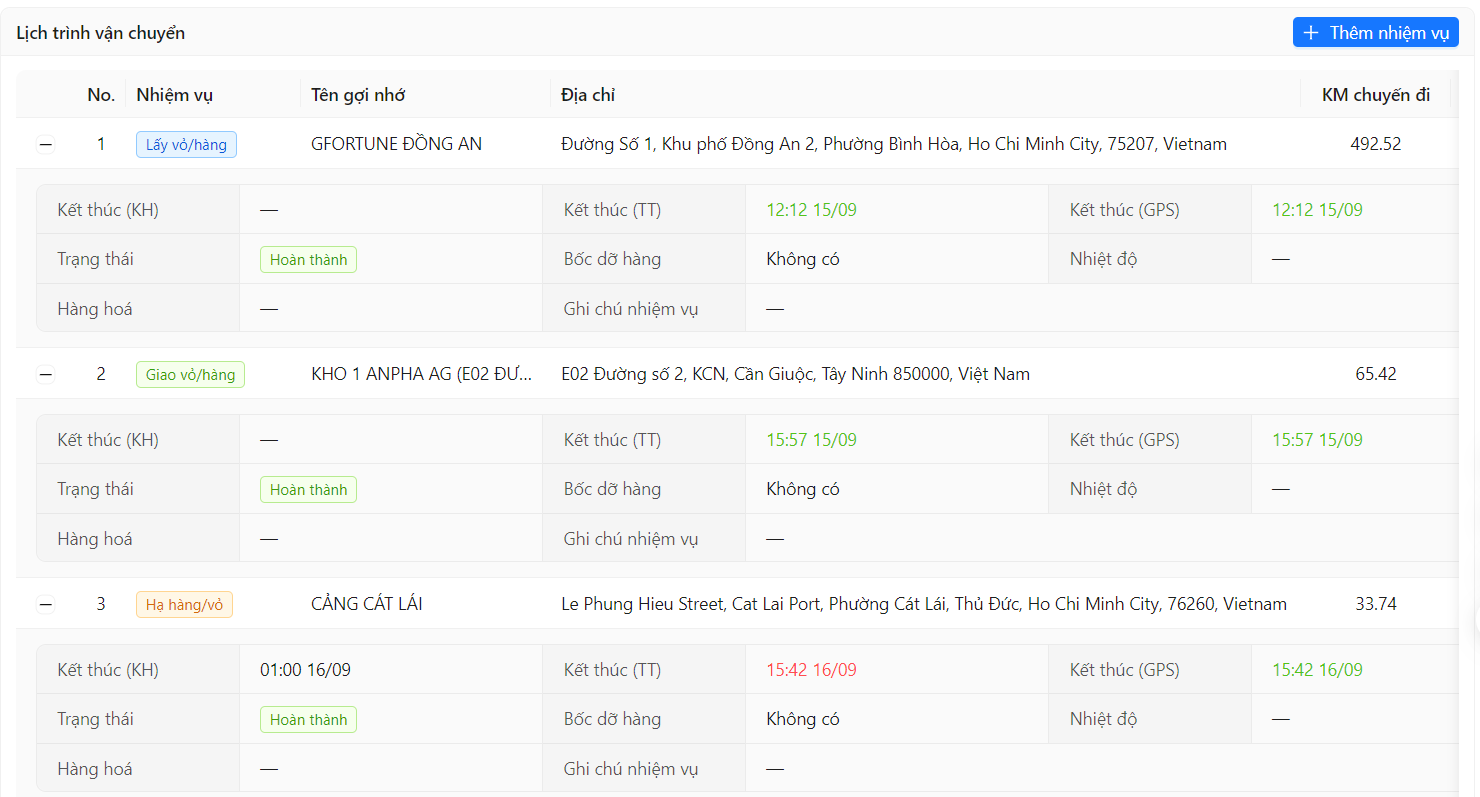
Track order information, shipping progress and task schedules.
See order details
Stakeholder management
Dispatch
The Dispatch Management function helps manage information and operational status of dispatchers in the system.
-
Display dispatcher list with name, phone number and email.
-
Allow adding new dispatchers.
-
Information can be edited when needed.
-
Manage the Active/On – Off status of each dispatcher
Usage steps
Step 1
Go to Order Management → Dispatch.
Step 2
See list of dispatchers.
Step 3
Click Add New to create a dispatcher or select the edit icon to update information.
Step 4
Turn on/off Active status to manage employees using the system.
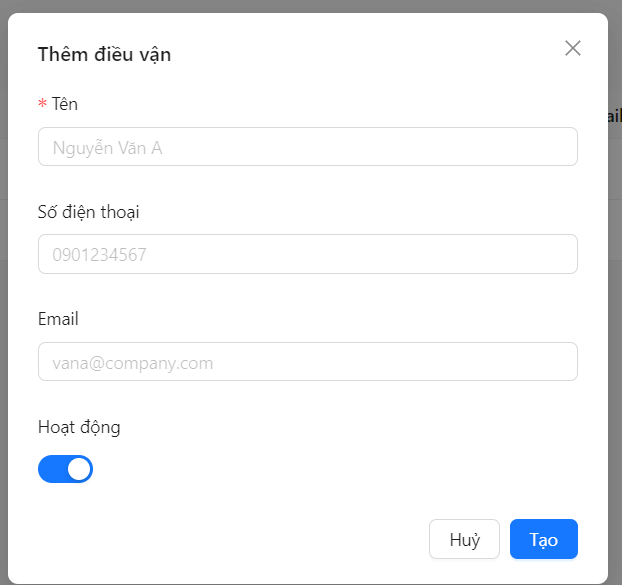
Add new dispatcher
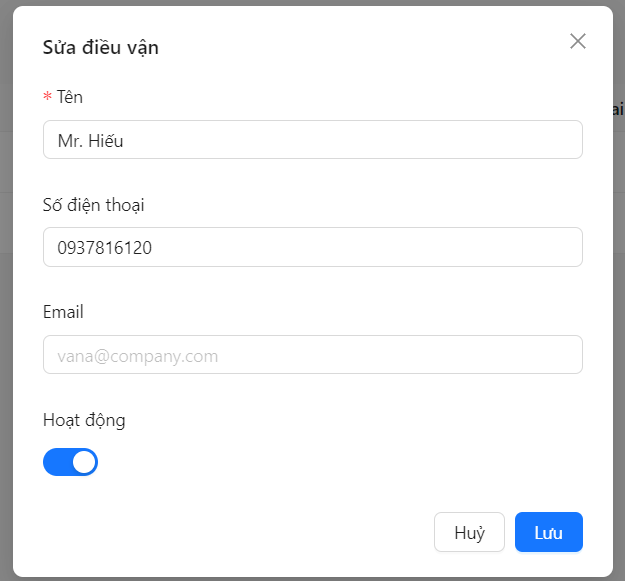
Edit dispatch:
Deliverer
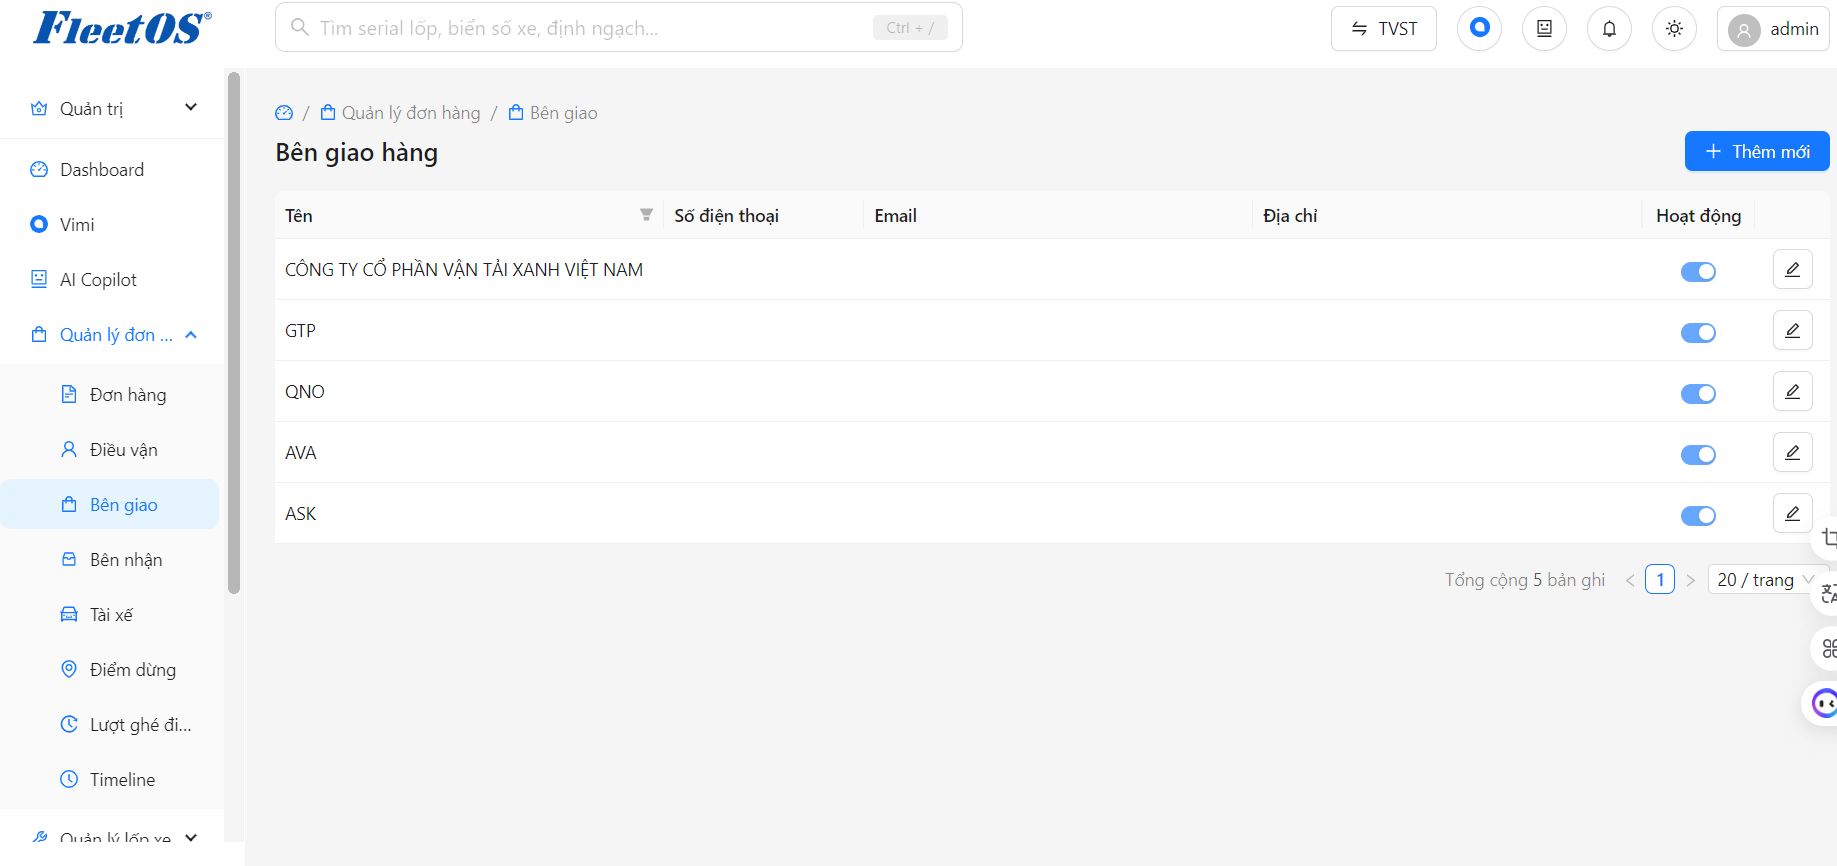
The Delivery Party Management function helps manage information and operational status of delivery parties in the system.
-
Displays a list of deliverers with names, phone numbers, emails and addresses.
-
Allow adding new delivery parties.
-
Information can be edited when needed.
-
Manage the Active/On – Off status of each transferor.
Usage steps
Step 1
Go to Order Management → Shipper.
Step 2
See list of delivery parties.
Step 3
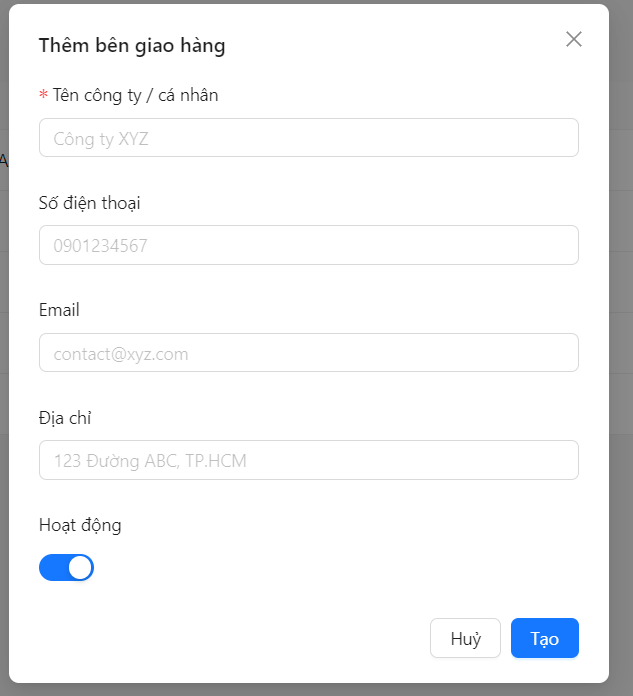
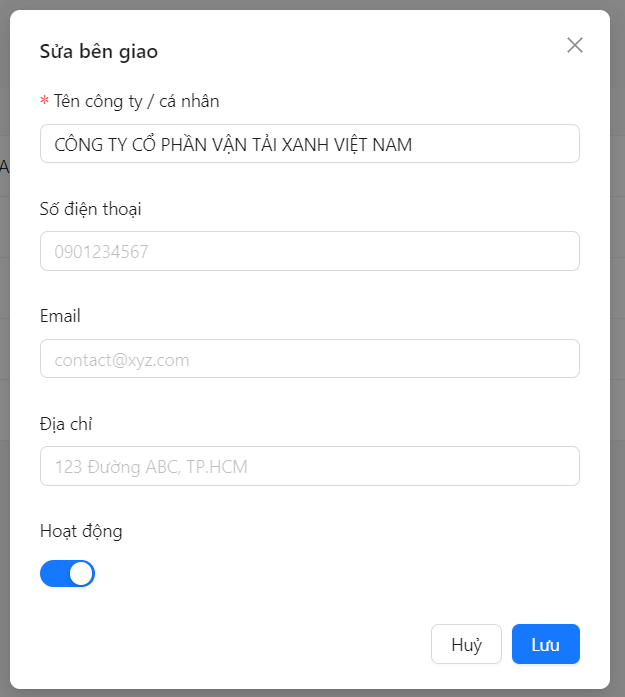
Click Add New to create a transferor or select the edit icon to update information.
Step 4
Turn on/off Active status to manage the delivery parties using the system.
New addition
Edit delivery side
Receiving party
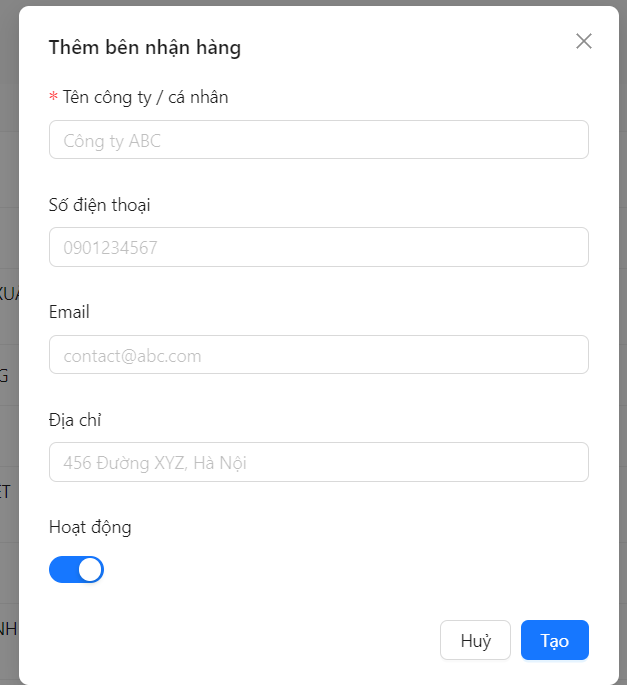
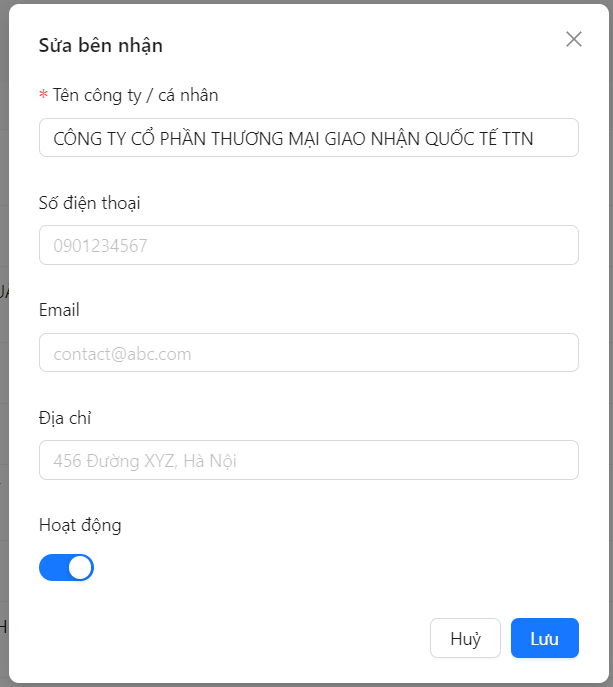
The Recipient Management function helps manage information and operational status of consignees in the system.
-
Display a list of recipients with name, email phone number and address
-
Allow adding new recipients.
-
Information can be edited when needed.
-
Manage the Active/On – Off status of each recipient.
Usage steps
Step 1
Go to Order Management → Recipient.
Step 2
See list of recipients.
Step 3
Click Add New to create a recipient or select the edit icon to update the information.
Step 4
Enable/disable Active status to manage recipients using the system.
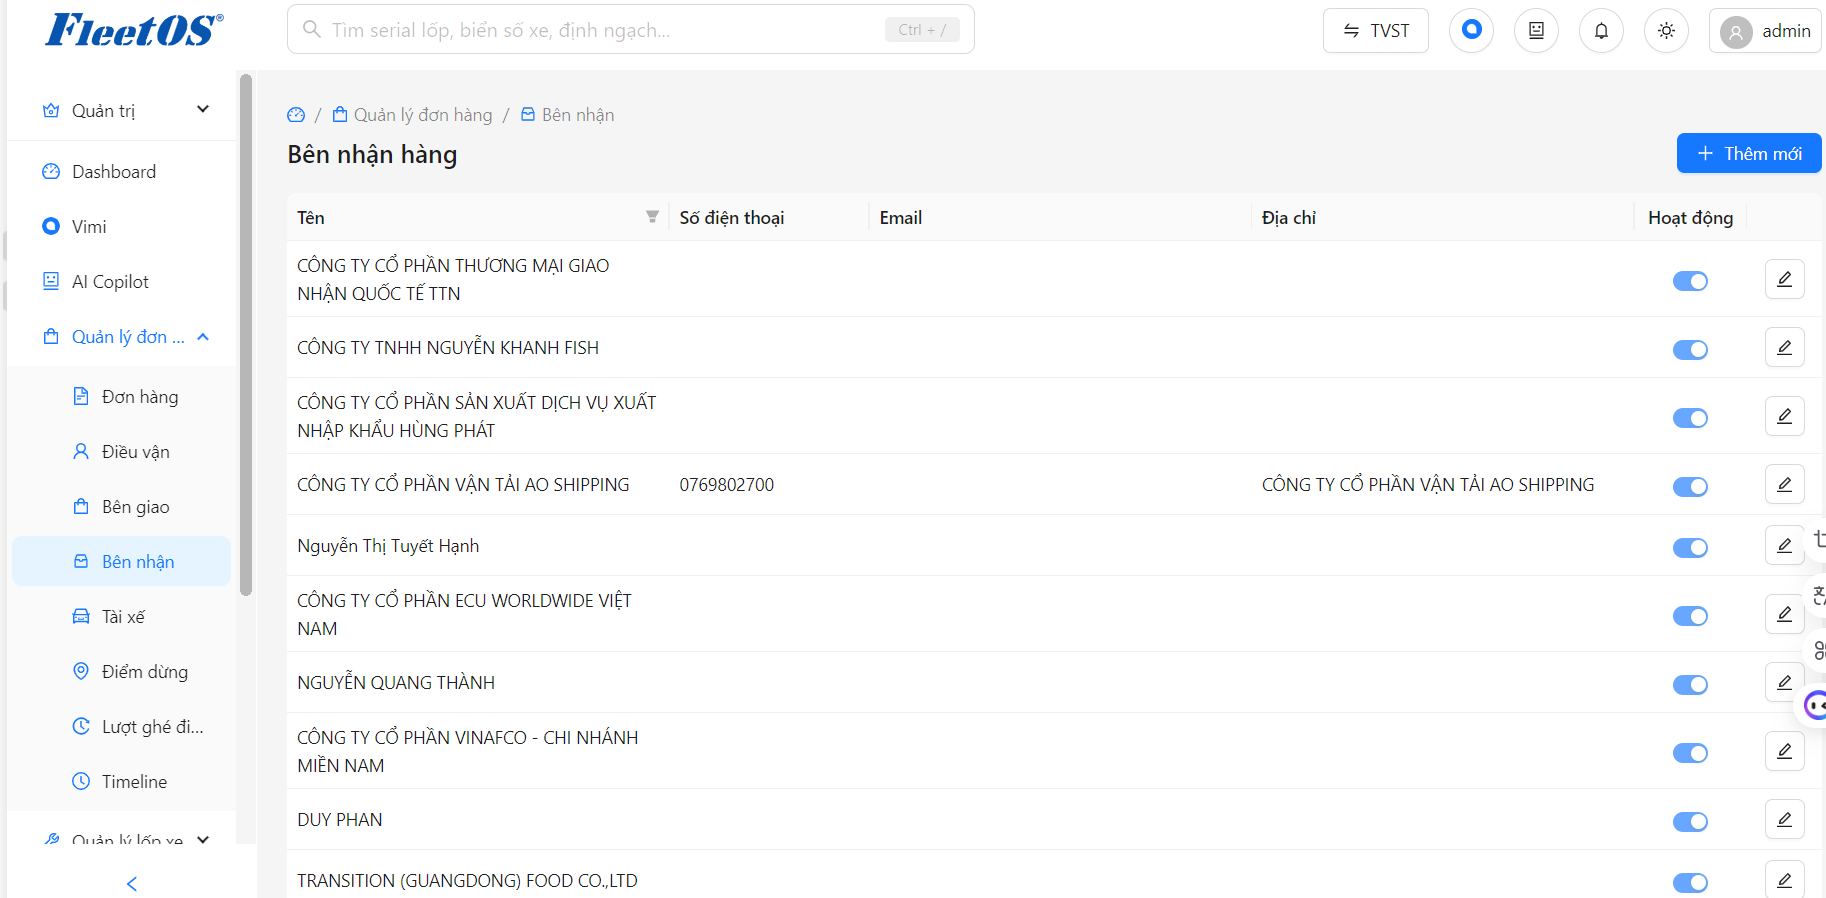
Add new consignee:
Edit consignee:
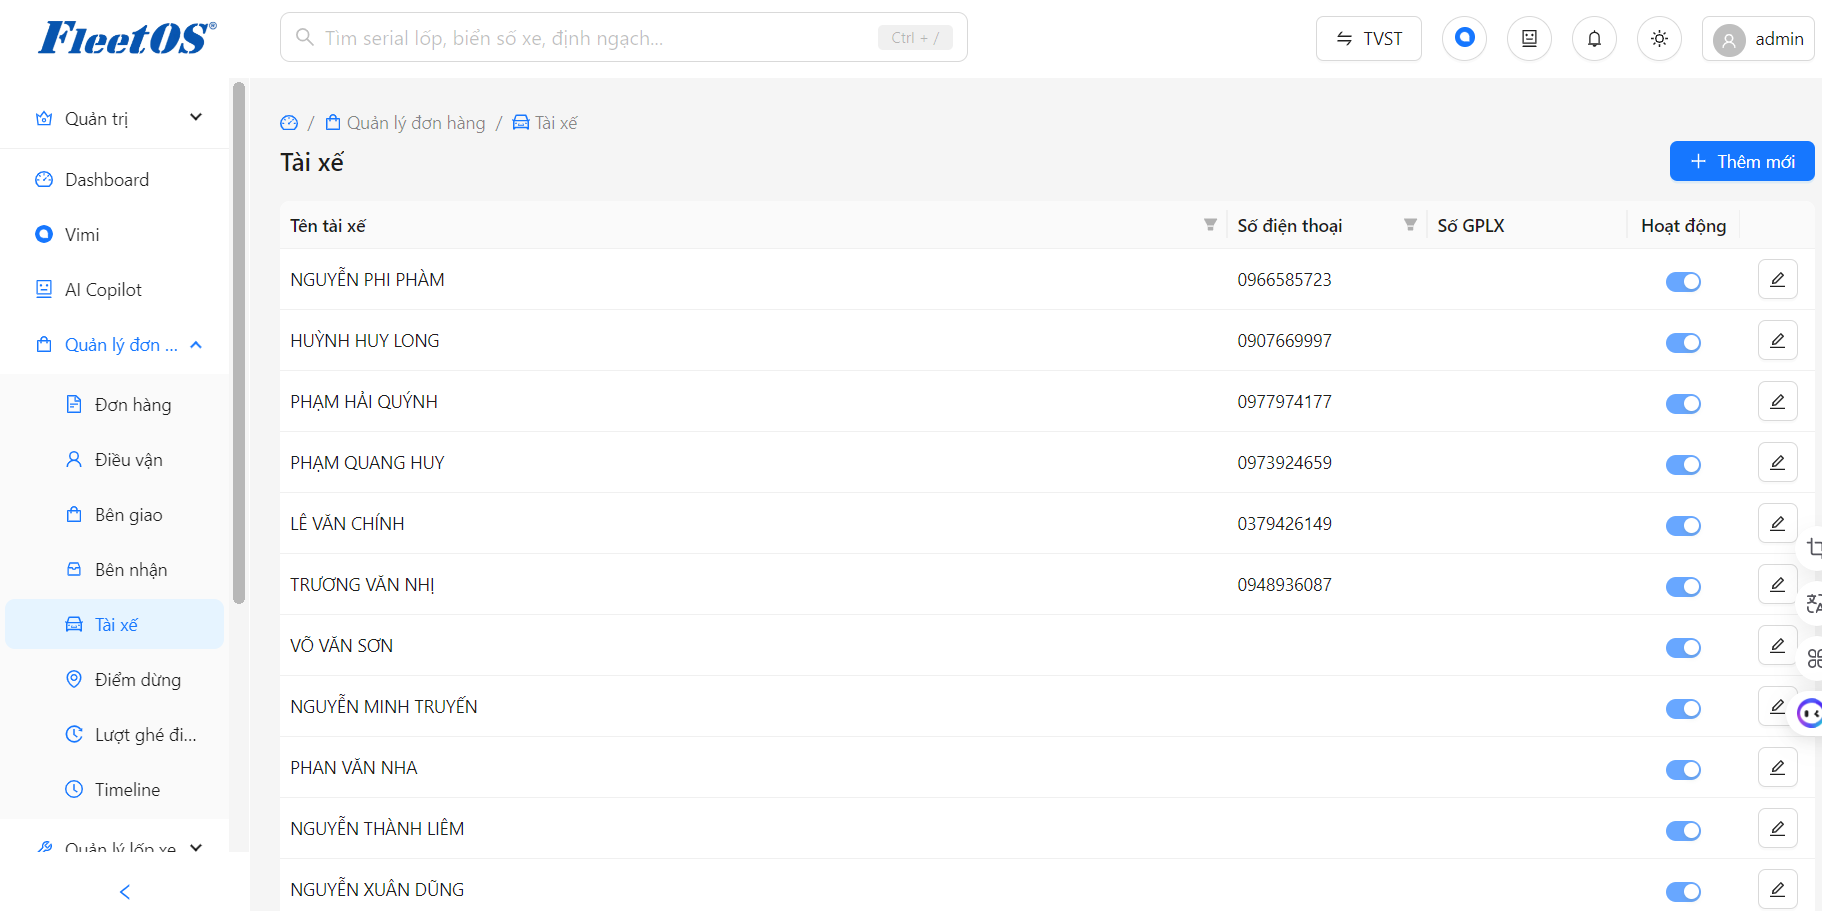
Driver
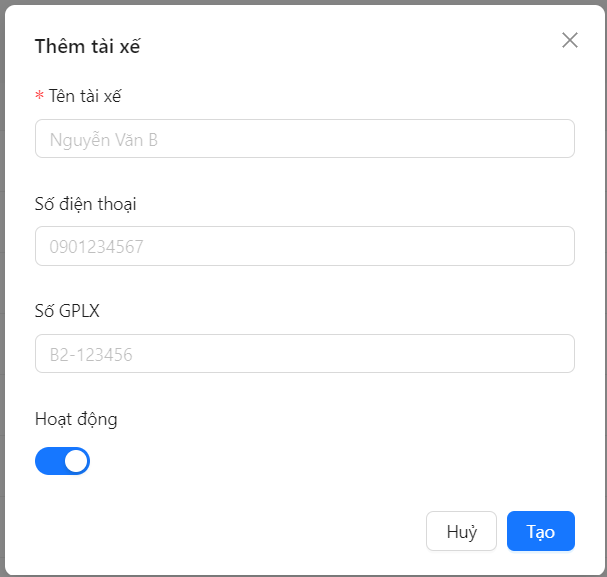
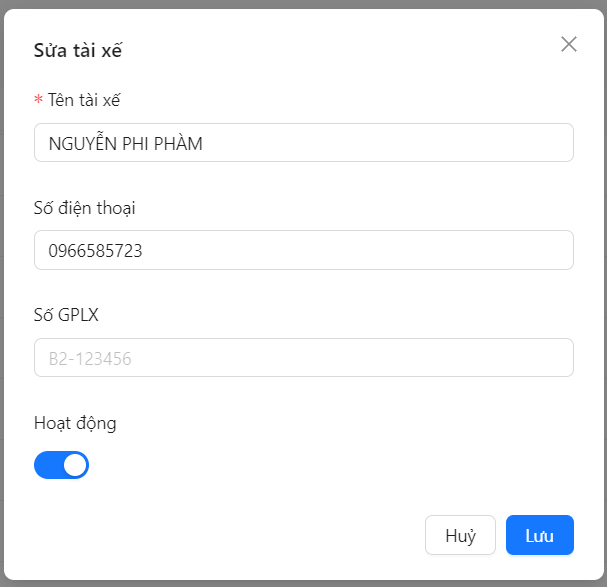
The Driver Management function helps manage information and operational status of drivers in the system.
-
Display a list of drivers with name, phone number and email.
-
Allow adding new drivers.
-
Information can be edited when needed.
-
Manage Active/On – Off status of each driver.
Usage steps
Step 1
Go to Order Management → Driver.
Step 2
See list of drivers.
Step 3
Click Add New to create a driver or select the edit icon to update information.
Step 4
Enable/disable Active status to manage active drivers.
New driver added:
Edit driver
Stop
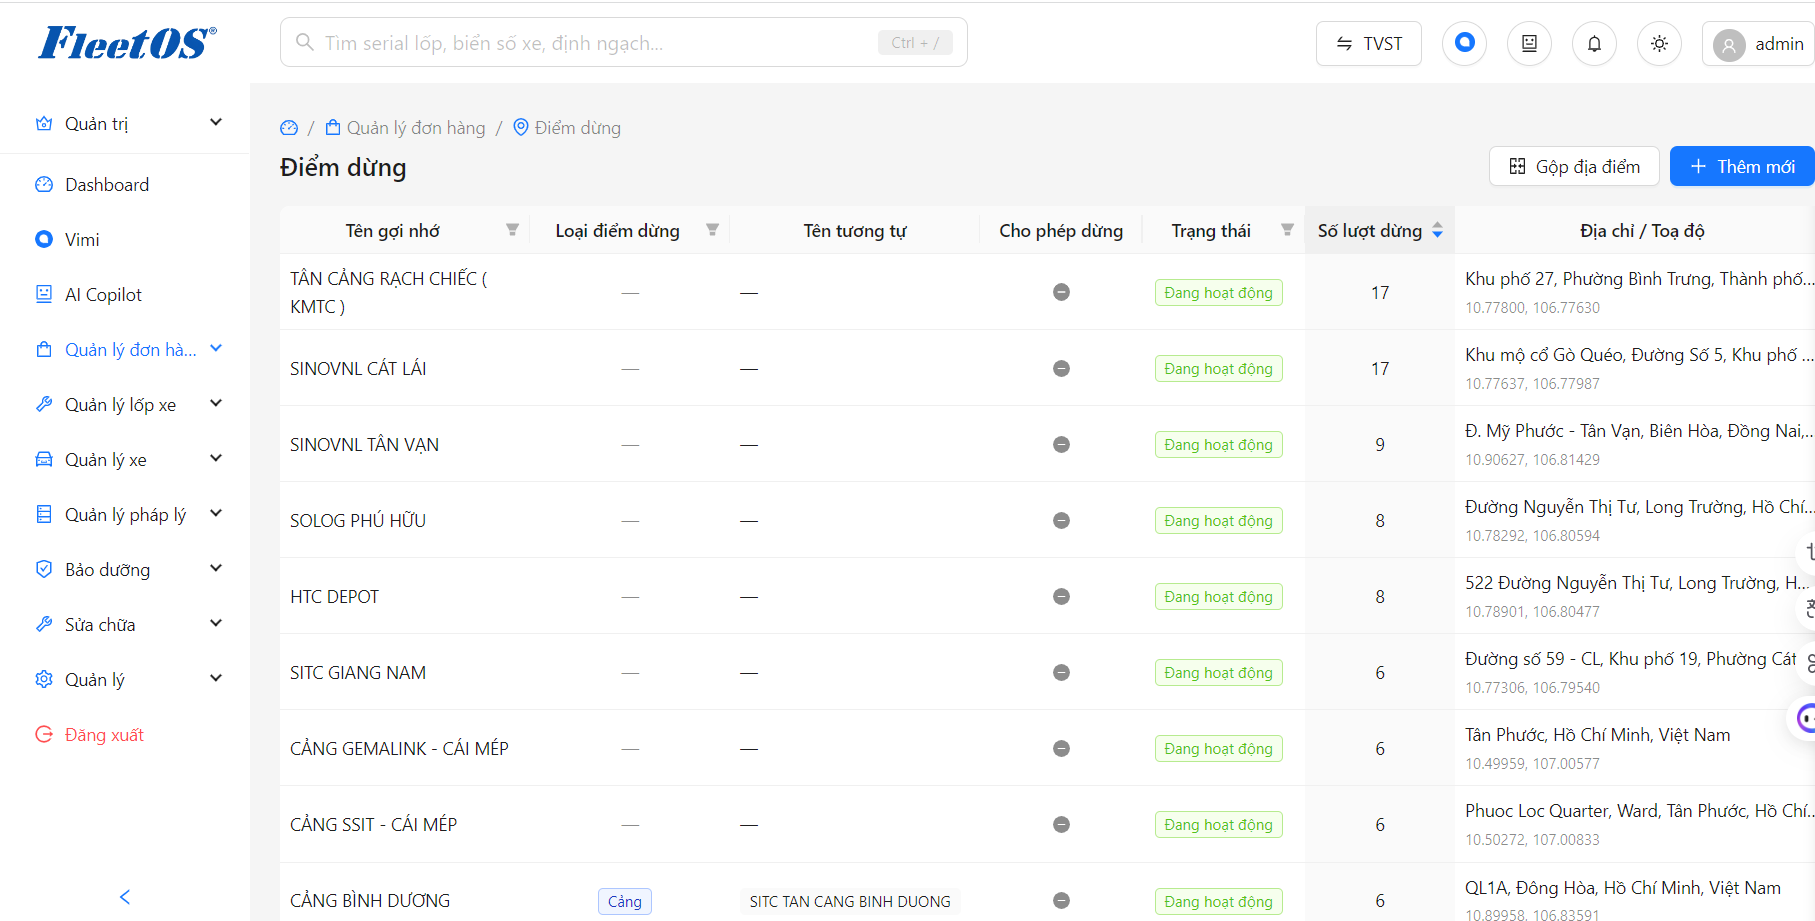
The Stop Management function helps store order delivery locations and provide detailed statistics on the number of stops at each location.
Displays a list of stops with reminder names, number of stops, address/coordinates and updater.
-
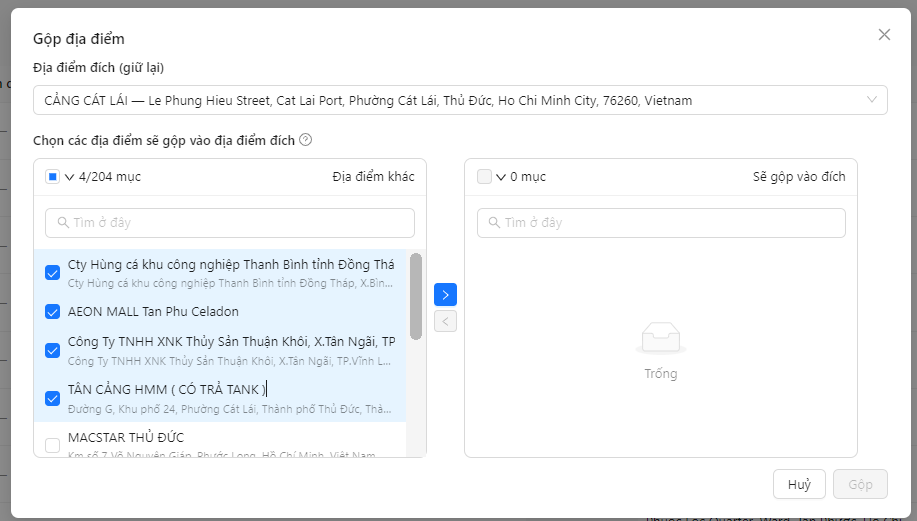
Allows adding new stops or merging locations (collecting duplicate points).
-
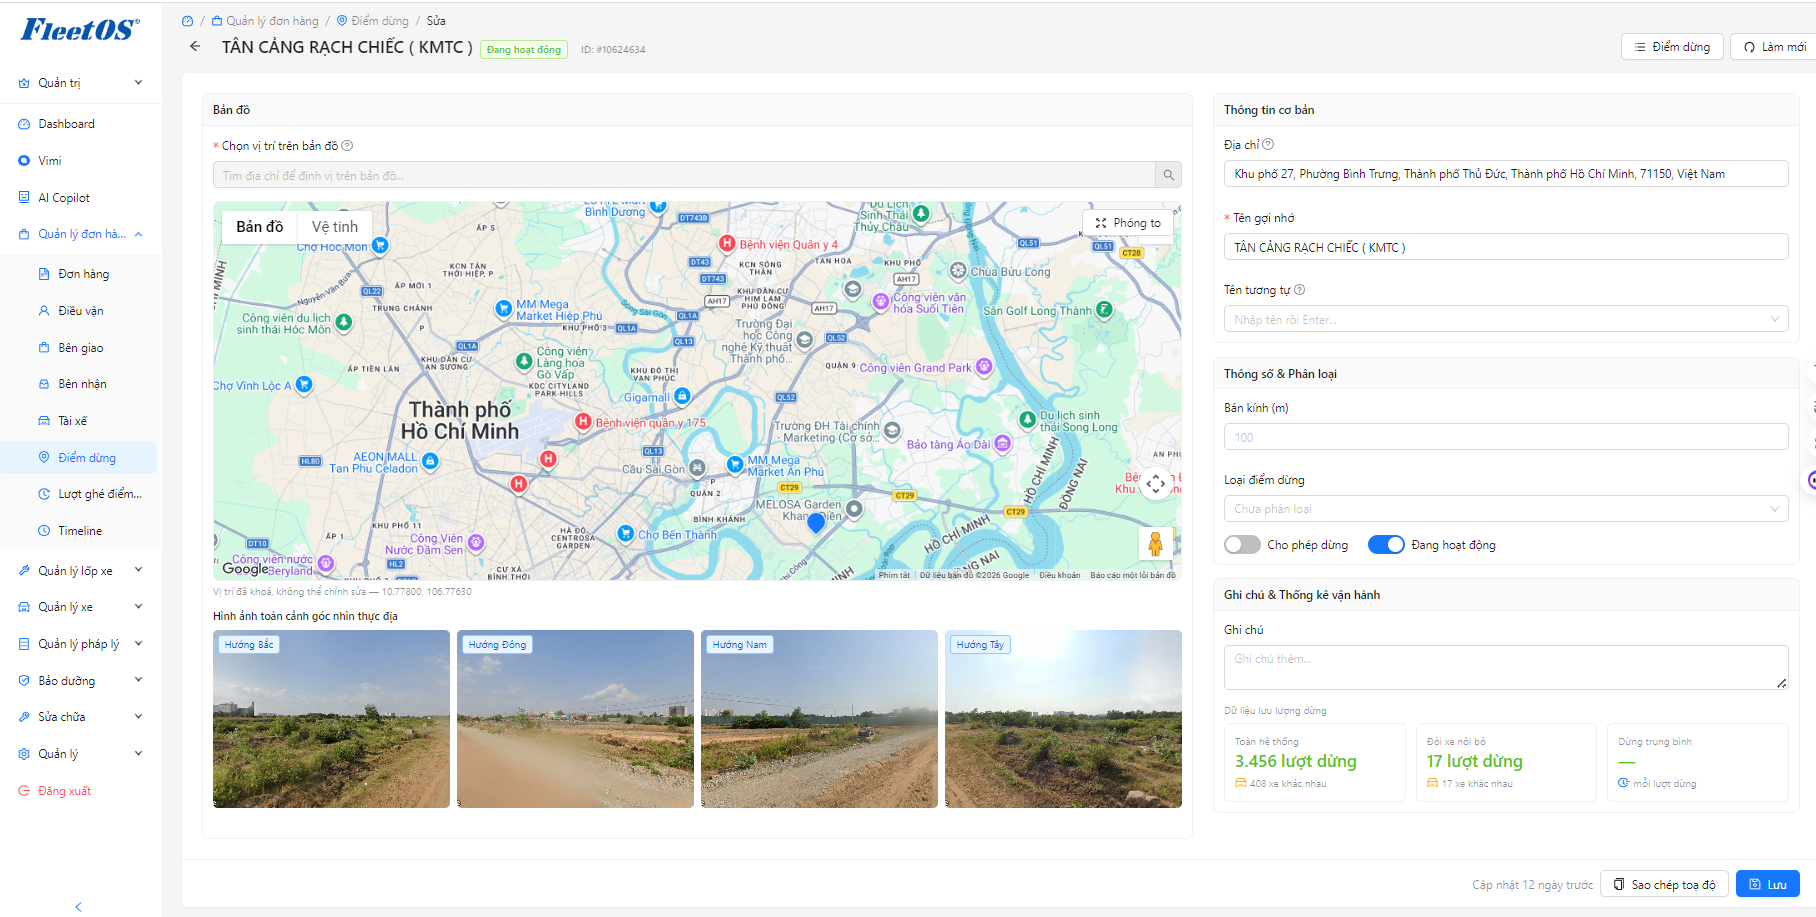
Stop information can be edited when needed through the operation icon.
-
Manage operating status (Active) and set “Allow stop” of each location.
Usage steps
Step 1
Go to Order Management → Stops.
Step 2
View the list of stops and monitor the “Number of stops” column to see how often each location arrives.
Step 3
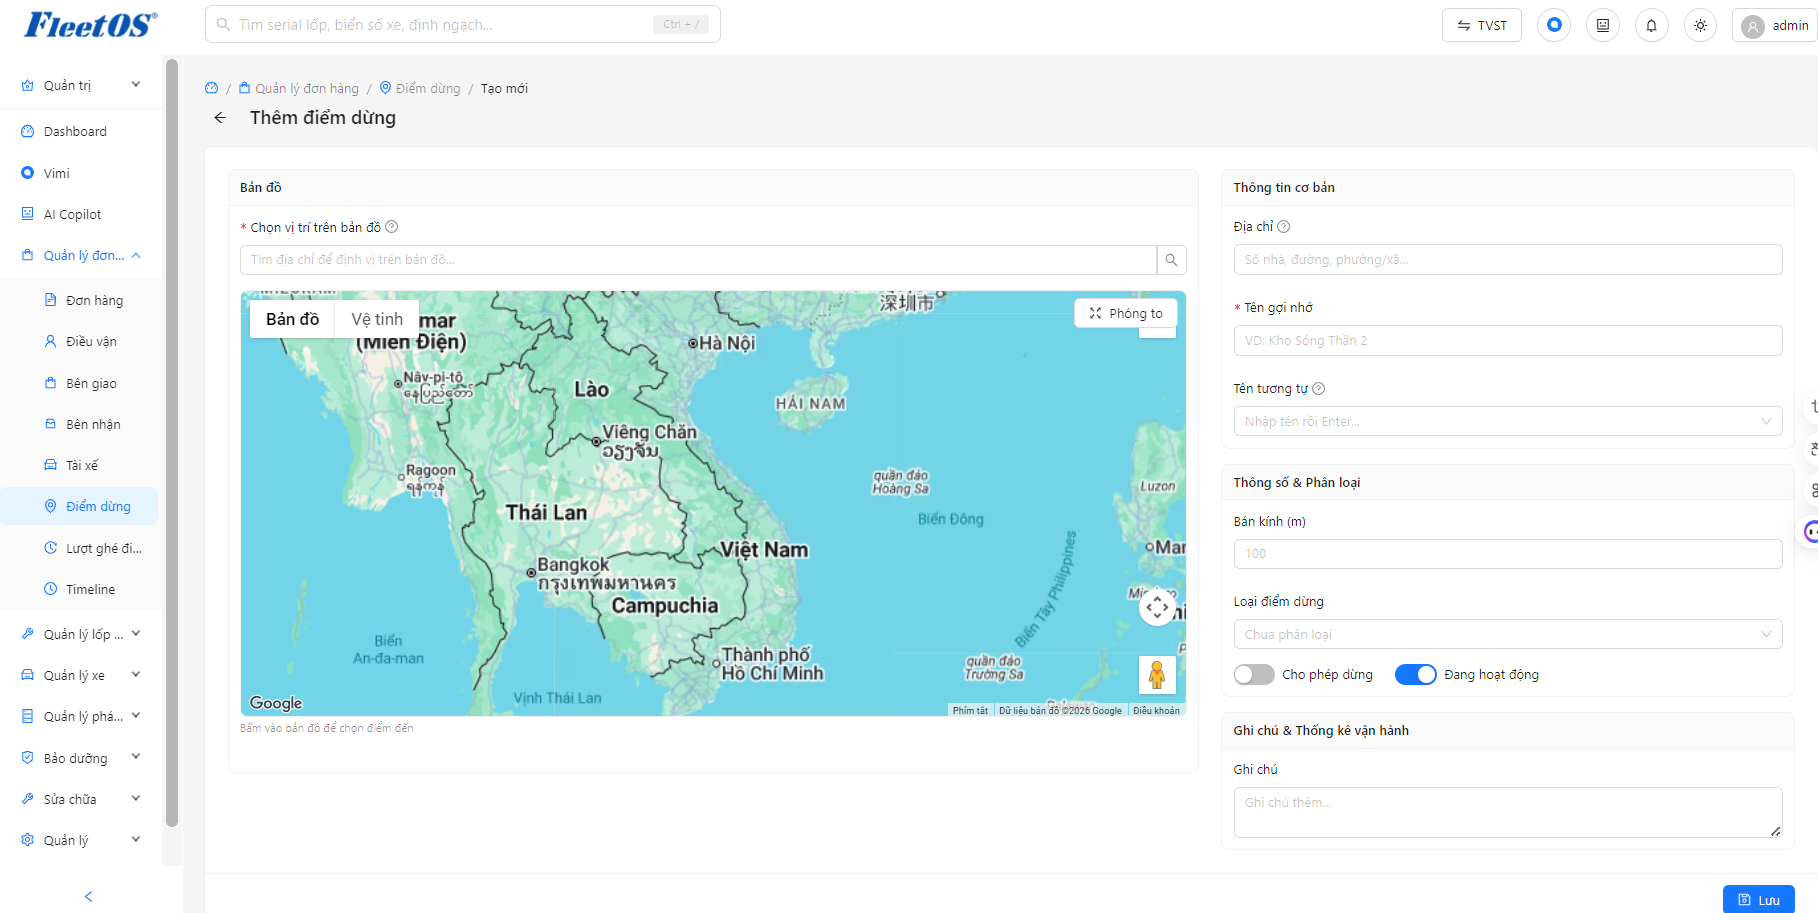
Click the Add new button to create a stop point, the Merge locations button to handle duplicate points, or select the pen icon in the “Action” column to update information.
Step 4
Manage Status and Setup Stop permissions to control available locations on the system.
Add new stop
Incorporate locations
Edit
Visits
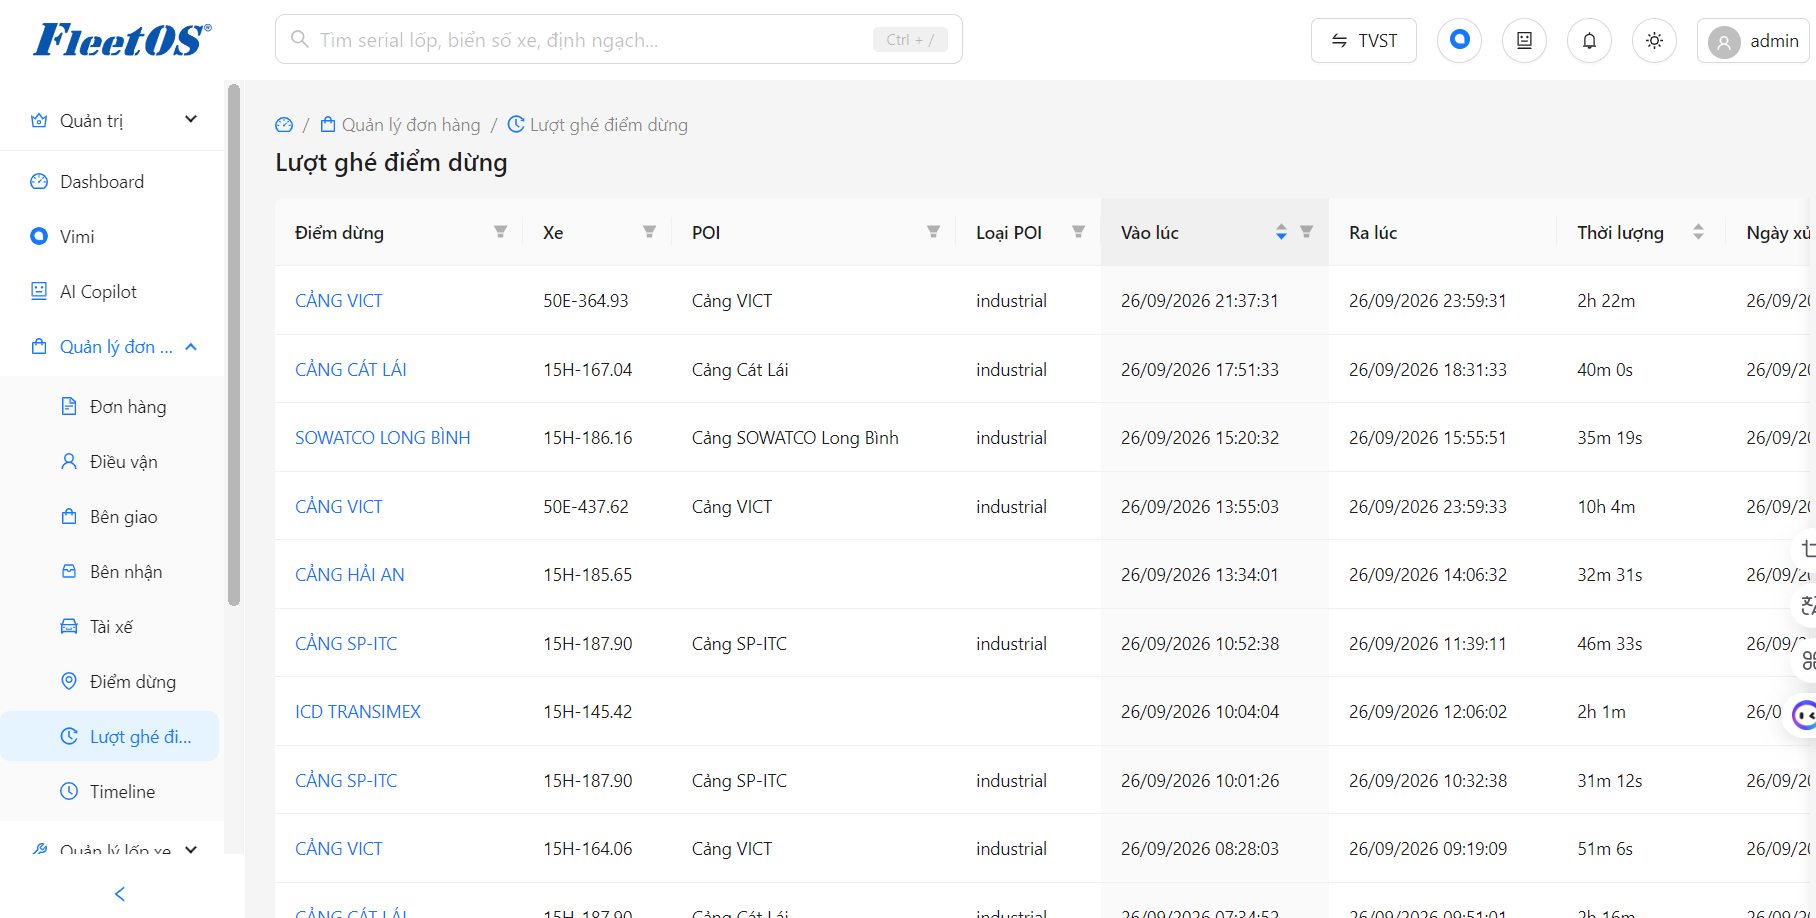
The Stop Visit Management function helps track and store detailed operational history of vehicles entering and exiting locations (such as ports, warehouses, ICDs), supporting control of vehicle stay time and operating performance.
-
Displays a list of stops, including detailed information about Stop name, Vehicle license plate, POI name and POI Type (eg industrial).
-
Accurately record the “In time” and “Out time” vehicle travel times at each location.
-
Automatically calculate and display the vehicle’s “duration” of stay at the stop (eg: 2h 22m, 40m 0s).
-
Provide “Processing date” information to facilitate data comparison and statistics by date.
Usage steps
Step 1
Go to Order Management → Stop Visits.
Step 2
Observe the comprehensive list to track details of which license plate numbers visited which stops. You can directly click on the stop name in the “Stop” column to view detailed records of that location.
Step 3
Use the filter icon in the column headers (Stop, Vehicle, POI Type, At) to quickly search and extract the desired data
Timeline
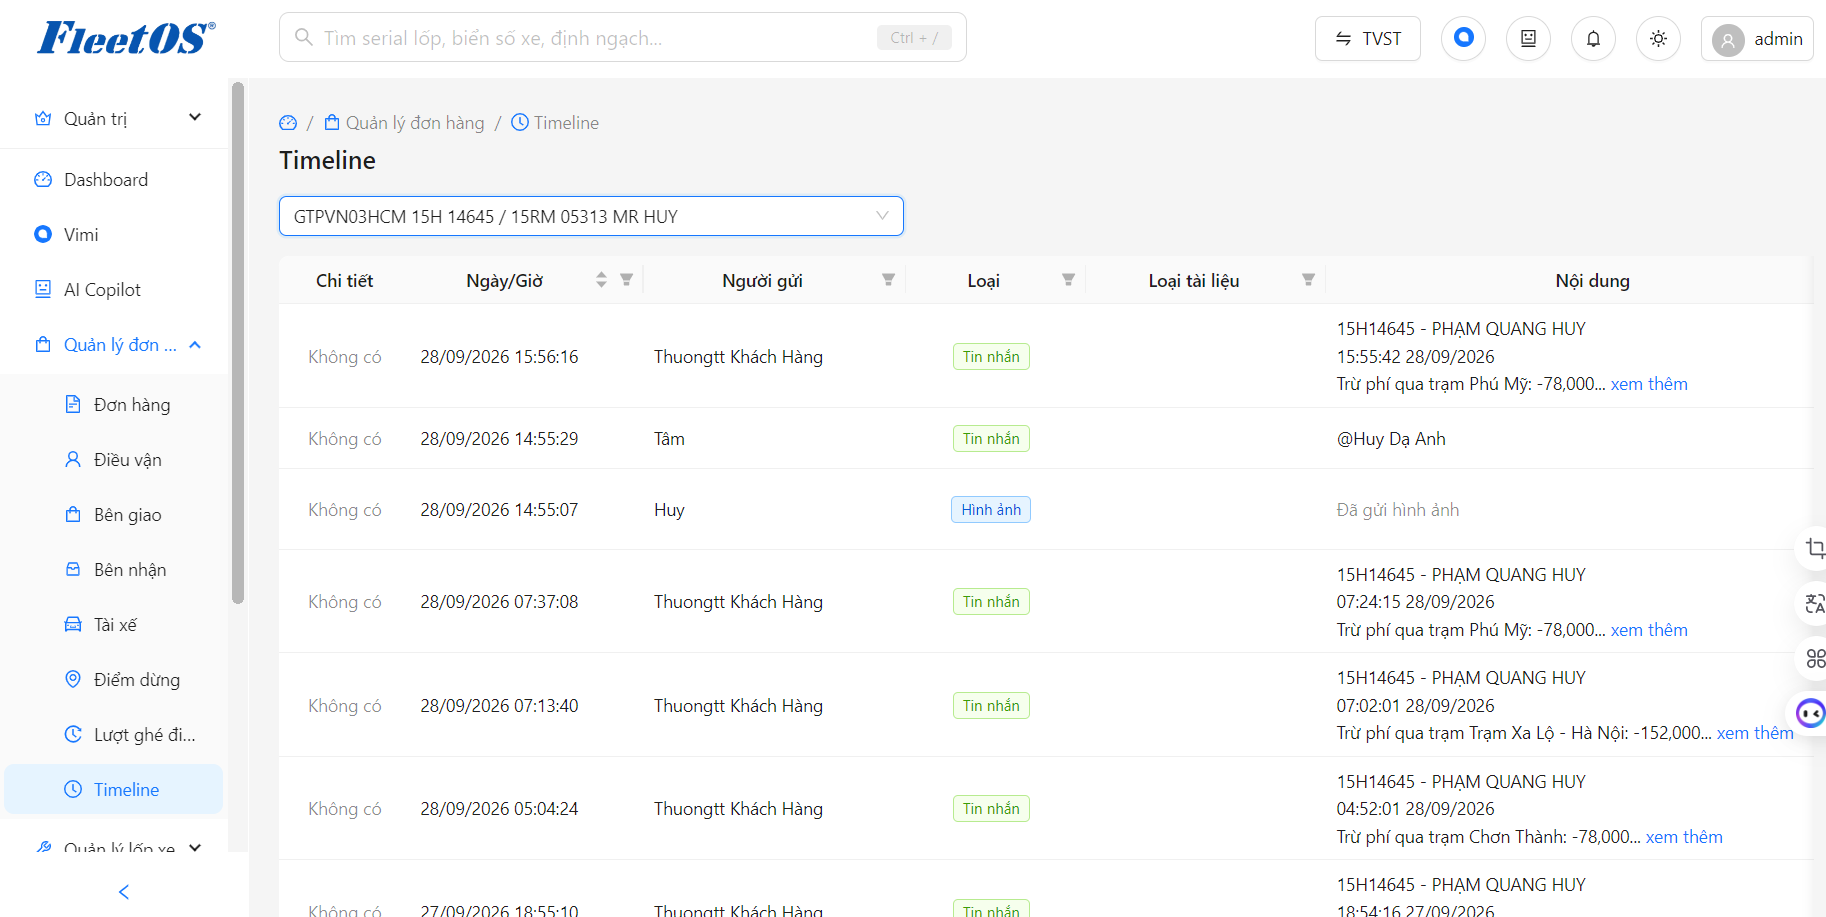
The Timeline function helps synchronize and store messages from Zalo groups
Usage steps
Step 1
Go to Order Management → Timeline.
Step 2
Select the Zalo group you want to view from the drop-down menu in the upper left corner.
Step 3
View the list or use filters in the columns to quickly find messages by Sender, Time, Content.